How to Save, Export & Print in Revit
Autodesk Revit is not just a modeling application; rather, it is a comprehensive Building Information Modeling (BIM) platform that manages geometry, data, and documentation together. Because every element in Revit is interconnected, understanding how to correctly save, export, and print your work becomes essential. Without proper file management, even a well-modeled project can face serious coordination or delivery issues.
This guide explains the complete workflow in a practical manner, helping professionals produce reliable outputs for clients, consultants, and construction teams.
Understanding File Management in Revit
Before using any command, it is important to understand how Revit stores information. Unlike traditional CAD software, Revit works on a database-based system. As a result, changes made in one view automatically affect all other views. Therefore, saving and exporting must be done carefully to maintain data integrity.
How to Save a Project in Revit
Saving is the most basic yet critical operation in Revit. Regular and correct saving protects your work from unexpected crashes or data corruption.
Basic Save Options in Revit
Revit offers multiple save methods, each designed for a specific purpose.
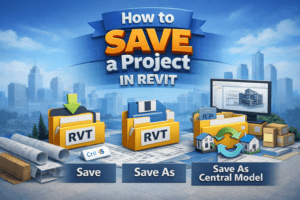
Save
This option updates the current project file with recent changes. Since modeling work can be lost quickly, it is recommended to save frequently using Ctrl + S.
Save As
In contrast, the Save As option creates a new file. This method is particularly useful when creating backups, archiving milestones, or starting a new phase from an existing model.
Save As Central Model
When working in a team environment, saving as a central model is essential. It allows multiple users to collaborate efficiently while maintaining control over shared elements.
Saving Workshared Projects Correctly
In collaborative projects, saving involves more than just pressing a shortcut key.
Synchronize with Central
Instead of saving locally only, users must synchronize with the central model. This process sends your changes to the main file while also retrieving updates made by others. Consequently, regular synchronization helps avoid conflicts and overwritten work.
Local File Management
Meanwhile, it is best practice to work on a local file rather than directly on the central model. Periodically recreating local files can also improve performance and reduce file-related issues.
Backup and Version Control
Revit automatically creates backup files, which can be extremely valuable in emergency situations.
Automatic Backups
These backups are stored in a separate folder and allow users to restore previous versions if a file becomes corrupted.
Manual Versioning
Additionally, saving milestone versions such as schematic design or issue-for-review files makes tracking project progress much easier.
How to Export Files from Revit
Exporting enables you to share Revit data with external software and project stakeholders. Since different consultants require different formats, Revit provides a wide range of export options.
Exporting to CAD Formats (DWG/DXF)
DWG export is commonly used for coordination with AutoCAD-based teams.
DWG Export Process
To export a DWG file, navigate to File > Export > CAD Formats > DWG, select the required views or sheets, adjust export settings, and choose a destination folder. Once configured correctly, the exported file will retain scale, layers, and line styles.
Important DWG Settings
Moreover, configuring layer mapping, units, and lineweight translation ensures compatibility with external CAD standards. Without these adjustments, drawings may appear incorrect when opened in AutoCAD.
Exporting to PDF in Revit
PDF files are widely used for submissions, approvals, and printing.
PDF Export Workflow
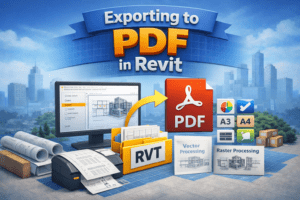
Instead of printing directly, exporting to PDF allows better control over quality. After selecting File > Export > PDF, users can choose paper size, orientation, and processing options.
Improving PDF Quality
For example, vector processing produces crisp lines and text, while raster processing handles shadows and gradients better. Therefore, selecting the appropriate option depends on the drawing type.
Exporting IFC and Image Files
Beyond standard formats, Revit also supports IFC and image exports.
IFC Export
IFC files are essential for BIM coordination. Since they preserve object data, they are widely accepted across various BIM platforms. However, verifying IFC mappings before export helps prevent data loss.
Image Export
Similarly, image exports are useful for presentations and reports. By adjusting resolution and zoom settings, users can produce high-quality visuals without unnecessary file size.
How to Print in Revit
Printing in Revit requires proper setup to ensure accurate output.
Print Setup Basics
After opening the Print dialog, users must select the correct printer, paper size, and print range. Otherwise, drawings may be cut off or scaled incorrectly.
Print Quality Control
Furthermore, choosing between color, grayscale, or black lines impacts readability. Vector printing is faster, whereas raster printing provides better visual effects.
Printing Multiple Sheets Efficiently
For large projects, batch printing is highly effective.
Print Sets
By creating saved print sets, teams can reuse the same settings repeatedly. As a result, consistency across issued drawings is maintained.
Best Practices for Save, Export & Print
Consistency, review, and automation are key to an efficient workflow. Always review exported files before sending them out, and use predefined settings wherever possible. Ultimately, these habits reduce errors and improve productivity.
Final Thoughts
Knowing how to save, export, and print in Revit is just as important as modeling itself. When done correctly, these processes protect your work, support collaboration, and ensure professional-quality deliverables. Overall, mastering these skills will significantly improve both efficiency and confidence in real-world projects.