How to Link AutoCAD & Revit Files
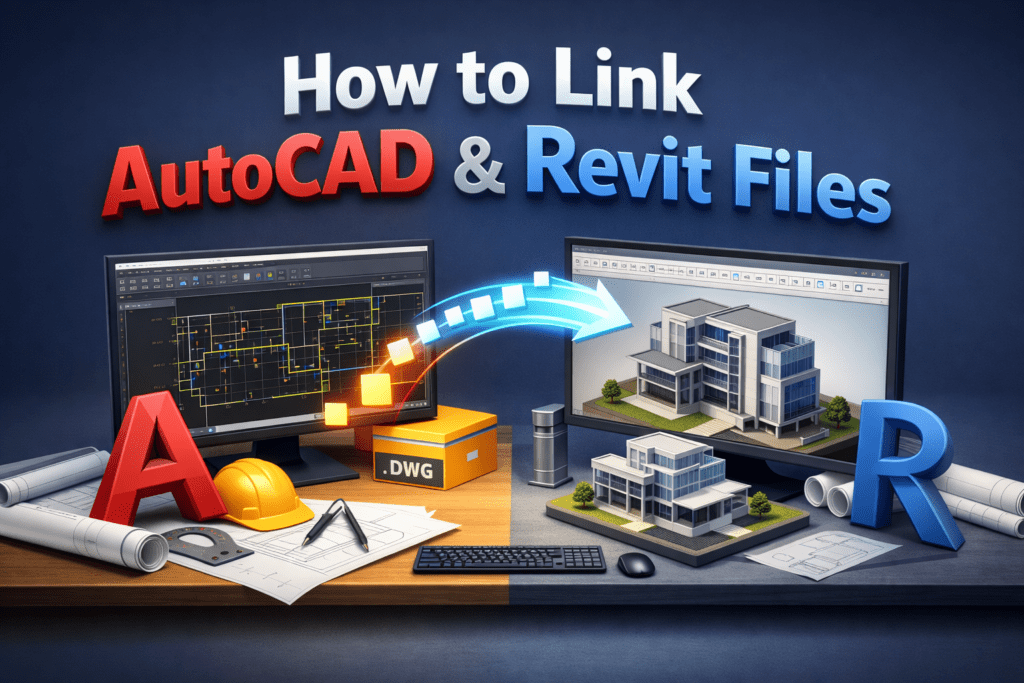
In the Architecture, Engineering, and Construction (AEC) industry, AutoCAD and Revit are two of the most widely used design tools. Many projects start with AutoCAD drawings and later move into Revit for Building Information Modeling (BIM), which makes it important for professionals to understand How to Link AutoCAD & Revit Files efficiently.
Linking AutoCAD files into Revit allows designers to reuse existing drawings instead of recreating them from scratch. Architects, engineers, and BIM modelers often receive DWG drawings from consultants, surveyors, or architects, and these drawings serve as references for creating intelligent Revit models.
However, many beginners confuse importing CAD files with linking CAD files, which can lead to heavy models, coordination issues, and scaling problems. Understanding the correct workflow ensures that your project remains organized, lightweight, and easy to manage.
This article explains the complete process of linking AutoCAD files to Revit, including preparation of CAD files, step-by-step linking methods, coordination tips, and best practices used by BIM professionals.
Understanding the Relationship Between AutoCAD and Revit What is AutoCAD?
AutoCAD is a drafting software widely used for creating 2D drawings and technical documentation. It allows users to draw precise lines, arcs, and geometry used in construction drawings such as floor plans, sections, and details.
Most consultants still share project information in DWG format, which is the standard file format of AutoCAD.
What is Revit?
Revit is a Building Information Modeling (BIM) software that focuses on creating intelligent 3D models of buildings. Unlike AutoCAD, which uses lines and shapes, Revit uses parametric building elements such as walls, floors, doors, windows, and mechanical systems.
These elements contain real project information, making Revit powerful for coordination, quantity takeoffs, and construction documentation.
Worksets & Collaboration in Revit
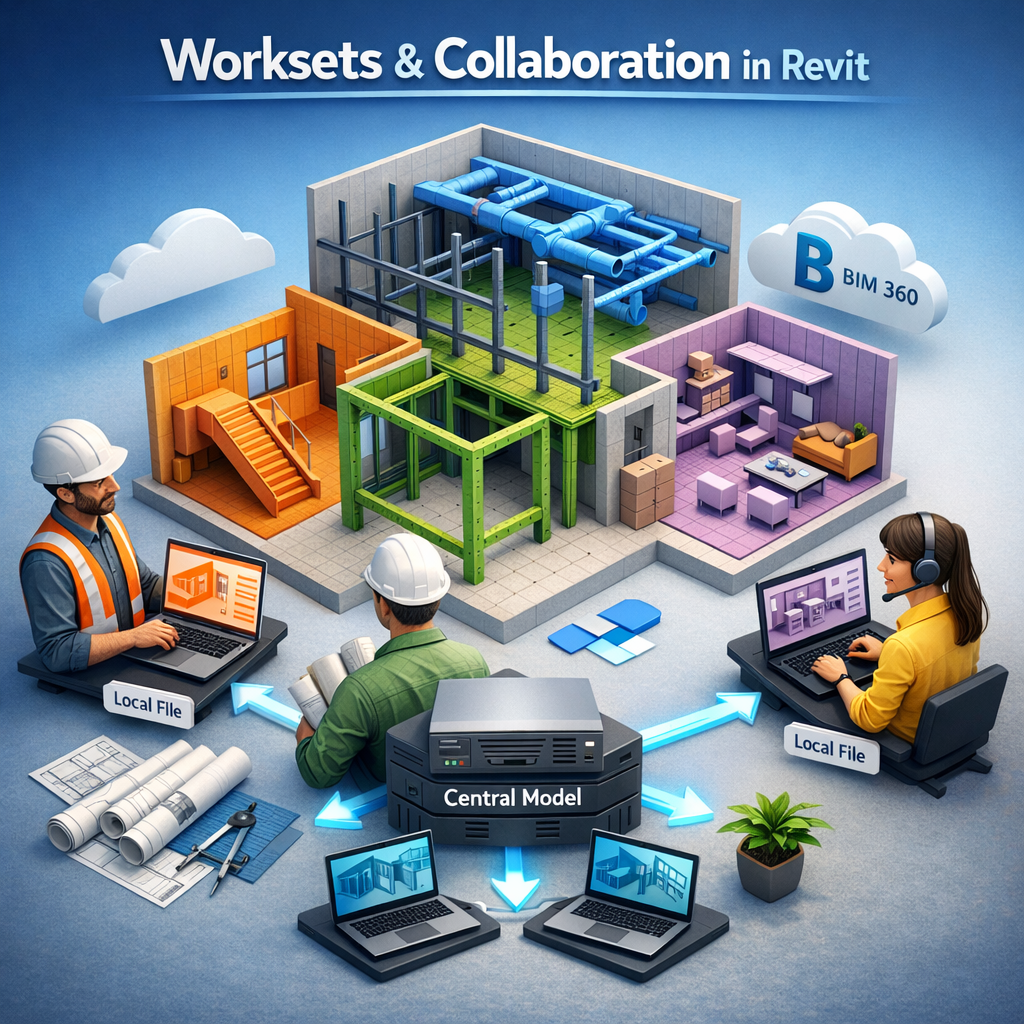
Worksets & Collaboration in Revit have transformed the way architects, engineers, and designers work together on modern construction projects. Today’s BIM projects are complex and require multiple professionals to collaborate on a single model at the same time. With the help of Worksets & Collaboration in Revit, teams can efficiently manage shared models, coordinate their work, and avoid overwriting each other’s changes while working in a collaborative BIM environment.
One of the most important features that enables team collaboration in Revit is Worksets. Worksets allow multiple users to work on the same project model at the same time while maintaining control over different parts of the model.
In this guide, we will explore how Worksets function, how they improve collaboration, and how teams can use them effectively in real-world projects.
Understanding Collaboration in Revit
In traditional CAD workflows, multiple people working on the same file could easily cause version conflicts, overwritten files, and coordination issues. Revit solves this problem through worksharing, a system that allows several users to work on a central model.
When worksharing is enabled, the model is divided into manageable sections so that different users can edit specific parts without interfering with others.
What is Worksharing?
Worksharing is the system that allows multiple users to access and modify a Revit model simultaneously.
Instead of everyone editing a single file directly, Revit uses two main components:
Central Model
Local Copies
The central model is stored on a shared network location or cloud platform. Each team member creates a local copy of the central model on their computer. Users make changes in their local file and then synchronize their work back to the central model.
This workflow prevents conflicts and keeps everyone working with the latest project data.
Revit View Templates Explained
Revit View Templates Explained helps users understand how to maintain consistent graphics and visibility settings across multiple views in Autodesk Revit. In large projects with hundreds of views, managing visibility settings, detail levels, view scales, filters, and graphic overrides individually can quickly become difficult. Without using view templates, manually adjusting these settings for every view can consume significant time and increase the risk of inconsistencies in project documentation.
This is where Revit View Templates become extremely valuable.
View Templates allow users to control and standardize the visual settings of views. Instead of adjusting settings individually for each view, you can create a template and apply it across multiple views. This ensures consistency, saves time, and improves project quality.
In this guide, we will explore what Revit View Templates are, why they are important, how they work, and how you can use them effectively in your workflow.
What Are Revit View Templates?
A View Template in Revit is a collection of view settings that can be applied to multiple views to maintain consistency. These settings may include visibility controls, graphic overrides, filters, view scale, detail level, and many other parameters.
Instead of configuring each view manually, a template allows you to define the settings once and reuse them wherever needed.
For example, if you create a Floor Plan template for architectural drawings, you can control:
Visibility of categories
View scale
Detail level
Graphics overrides
View filters
Annotation visibility
Discipline settings
Once the template is created, you can apply it to multiple floor plan views and all those views will follow the same configuration.
Why View Templates Are Important in Revit
Managing views without templates can quickly become chaotic, especially in large BIM projects involving multiple disciplines.
View Templates provide several key benefits.
How to Export Revit Schedules to Excel

If you are learning How to Export Revit Schedules to Excel, it’s important to first understand how powerful schedules are inside Revit. In Building Information Modeling (BIM), schedules allow you to extract quantities, track materials, review equipment data, and manage project information directly from your model before exporting it to Excel for further analysis.
But when it comes to sharing data with clients, contractors, or quantity surveyors, Excel is often the preferred format. That’s why knowing how to export Revit schedules to Excel is an essential skill for every BIM professional.
In this complete guide, you’ll learn step-by-step methods to export schedules, fix common issues, and optimize your workflow for clean and accurate Excel outputs.
Why Export Revit Schedules to Excel?
Before jumping into the technical steps, it’s important to understand why exporting schedules matters.
Revit schedules are dynamic and model-driven. However, Excel provides flexibility that Revit does not:
Advanced calculations and formulas
Pivot tables and cost analysis
Easy sharing with non-Revit users
Data comparison between revisions
Integration with procurement systems
For professionals working in quantity takeoffs, cost estimation, or MEP coordination, exporting schedules to Excel becomes part of the daily workflow.
Understanding Revit Schedules Before Exporting
Before exporting, you must ensure your schedule is properly prepared. A poorly structured schedule will create messy Excel files.
Revit Schedules Explained (Doors, Windows, Quantities)
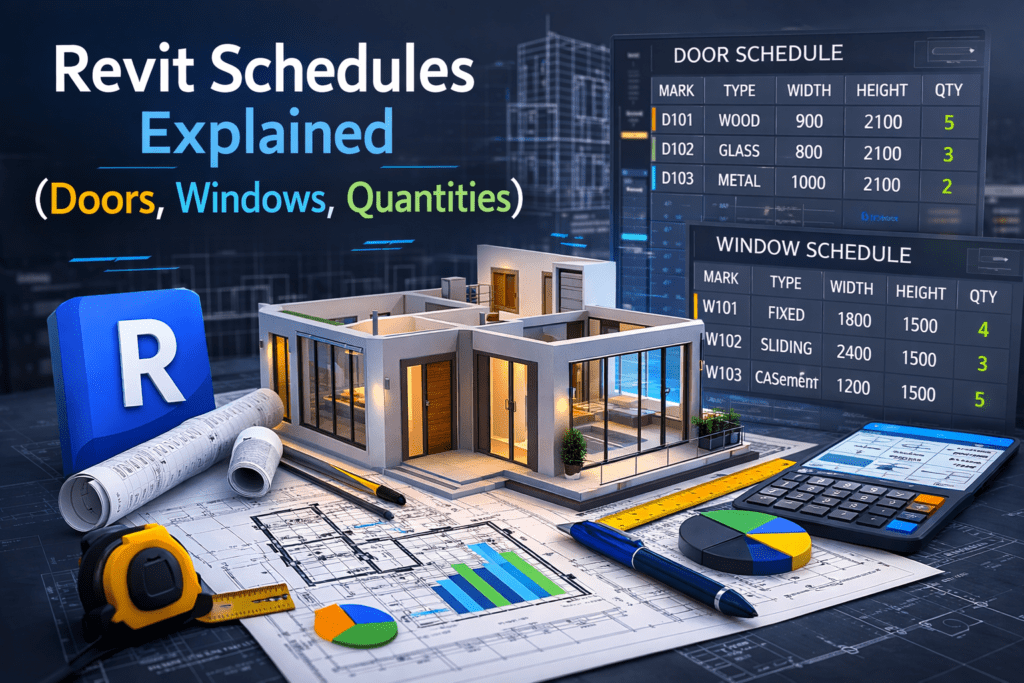
Revit schedules are one of the most powerful tools inside a BIM workflow. While many users focus heavily on modeling and 3D visualization, the real strength of Building Information Modeling lies in data. Schedules transform model elements into organized, live, and intelligent tables that update automatically as your project evolves.
Whether you are preparing architectural documentation, interior fit-out sheets, or quantity takeoffs for BOQ preparation, understanding Revit schedules—especially door schedules, window schedules, and quantity schedules—is essential for professional-level work.
What Is a Revit Schedule?
A Revit schedule is a tabular view of information extracted directly from the model. Every element placed in Revit contains parameters such as height, width, material, level, and type. Schedules read these parameters and display them in an organized format.
Unlike traditional spreadsheets, Revit schedules are fully connected to the model. This means:
If you change a door width in the model, it updates automatically in the schedule.
If you edit a parameter in the schedule, it updates the model.
There is no need for manual counting or cross-checking.
Schedules are not separate documents; they are live model views.
Why Revit Schedules Are Important
Schedules play a critical role in construction documentation and coordination. Contractors, consultants, and quantity surveyors rely on schedule data for:
Procurement
Cost estimation
Installation planning
Quality control
Using schedules improves:
Accuracy
Speed
Coordination between disciplines
Professional presentation
Instead of manually counting elements from plans, you allow the BIM model to generate accurate data automatically.
Revit Annotations (Dimensions, Tags, Text)
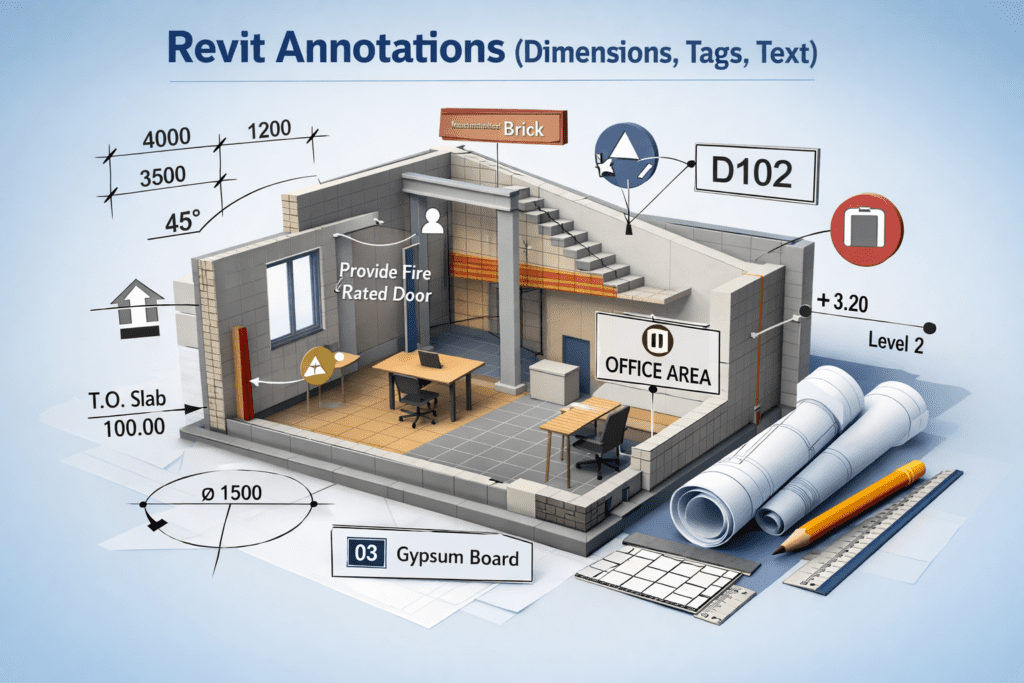
When we talk about professional BIM documentation, modeling is only half of the job. The real clarity of a project comes from how well it is documented. In Autodesk Revit, annotations play a critical role in turning a 3D model into clear, understandable construction drawings.
Annotations include dimensions, tags, text notes, symbols, keynotes, and detail components. They do not exist in 3D space like walls and doors. Instead, they live inside views and sheets, helping contractors, engineers, and clients understand exactly what needs to be built.
In this blog, we will explore Revit annotations in depth — how they work, why they matter, and how to use them professionally in real projects.
Understanding Revit Annotations
In simple words, annotations are view-specific elements that explain the model. They provide measurable data, labels, and written instructions.
Unlike model elements:
Annotations do not appear in 3D views (except certain symbols).
They are scale-dependent.
They belong to a specific view.
They update automatically when the model changes.
For example, if you move a wall, the dimension updates automatically. If you change a door type, the door tag updates instantly. This automation is what makes Revit documentation powerful and efficient.
Dimensions in Revit
Dimensions are one of the most important annotation tools in Revit. They communicate sizes, distances, offsets, and levels clearly.
How to Create Sections & Callouts Properly
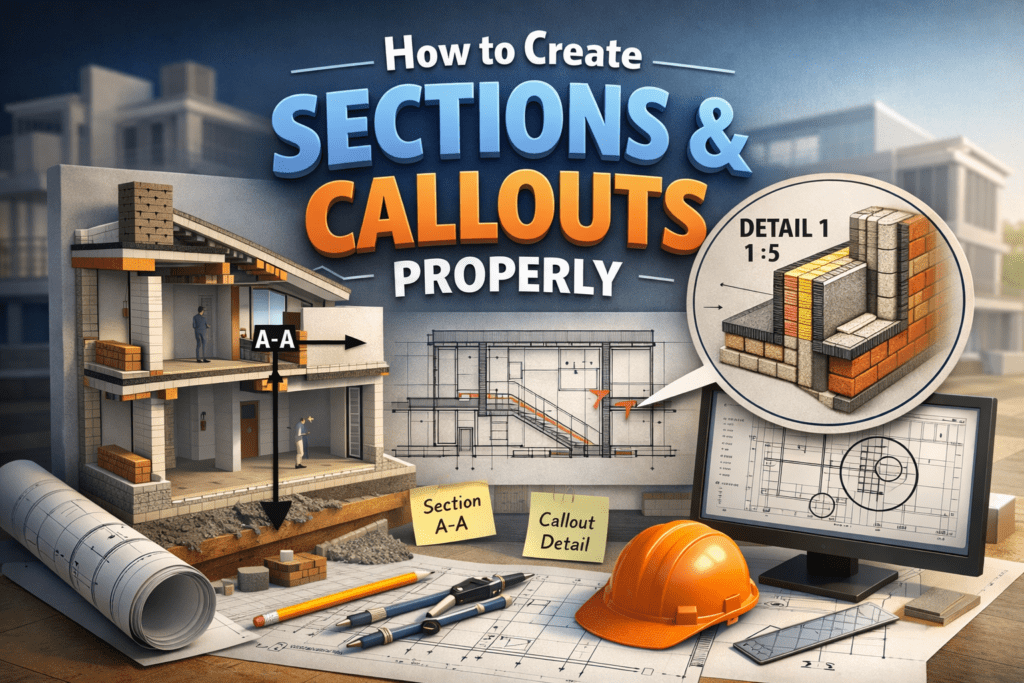
Understanding How to Create Sections & Callouts Properly is one of the most essential skills in architectural drafting and BIM documentation. Floor plans alone cannot fully explain a building’s design intent. To clearly communicate vertical relationships, detailed construction elements, and complex connections, you must know how to create sections and callouts properly with accurate placement and clear detailing.
This guide explains what sections and callouts are, why they matter, and how to create them correctly using professional standards. Whether you are a beginner or an experienced Revit user, mastering this topic will significantly improve your drawing quality.
Understanding Sections and Callouts
Before learning how to create them, you must clearly understand their purpose.
What Is a Section?
A section is a vertical cut through a building or object. Imagine slicing the building from top to bottom and looking directly at the cut surface. A section shows elements that cannot be fully understood in a floor plan, such as:
Floor-to-floor heights
Ceiling levels
Structural beams and slabs
Wall assemblies
Window head heights
Stair relationships
Sections reveal how different components connect vertically.
Revit Phasing Explained
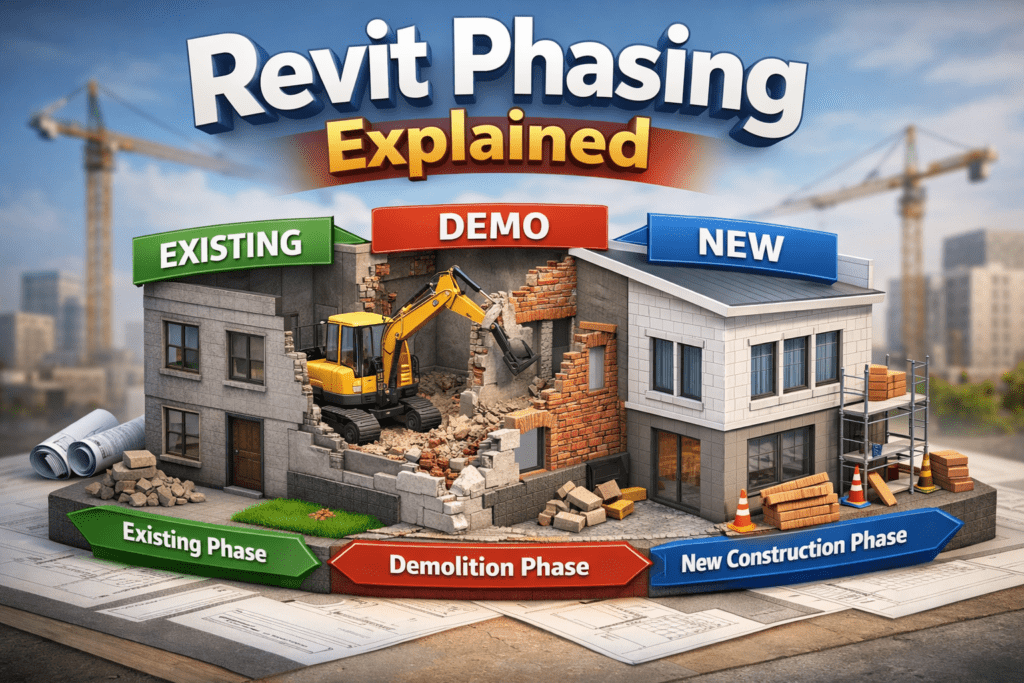
Building Information Modeling (BIM) is not only about creating 3D geometry. It is also about managing time, construction stages, and renovation processes inside a single intelligent model. One of the most powerful features in Autodesk Revit that helps manage time-based changes is Phasing.
In this detailed guide, we will explain Revit Phasing in simple language, including how it works, where it is used, and how you can control demolition, new construction, and renovation stages efficiently.
What Is Phasing in Revit?
Phasing in Revit is a system that allows you to represent different time periods of a project within one single model. Instead of creating separate files for existing and new construction, Revit allows you to control everything using phases.
In simple words:
A Phase represents a time period.
Every element in Revit belongs to:
A Phase Created
A Phase Demolished (if applicable)
This makes Revit extremely powerful for renovation, remodeling, expansion, and multi-stage construction projects.
Why Phasing Is Important in BIM Projects
In real-life construction projects, buildings are rarely constructed all at once. There are usually multiple stages such as:
Existing condition
Demolition
Renovation
New construction
Future expansion
Without phasing, you would need separate models or duplicate files. That creates confusion, coordination errors, and documentation problems.
With Revit Phasing:
You manage all time stages in one file.
You reduce coordination mistakes.
You generate correct drawings automatically.
You show clients existing vs proposed work clearly.
This saves time and improves project accuracy.
How to Create Custom Parameters in Revit
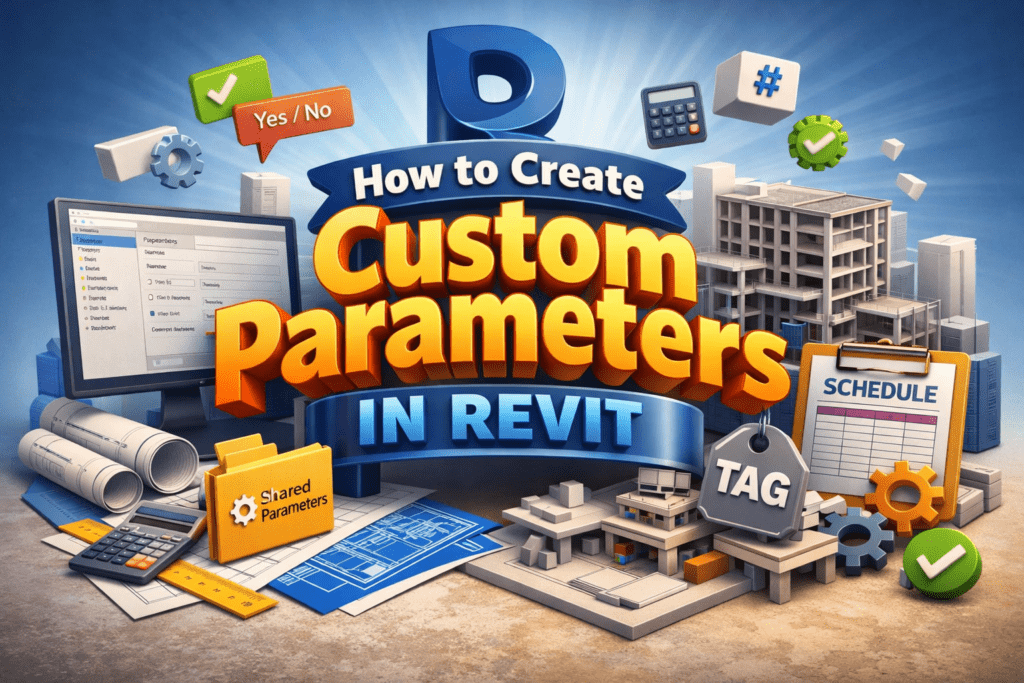
Why Custom Parameters Are Important in Revit
Understanding Parameter Types in Revit
Revit Parameters Explained
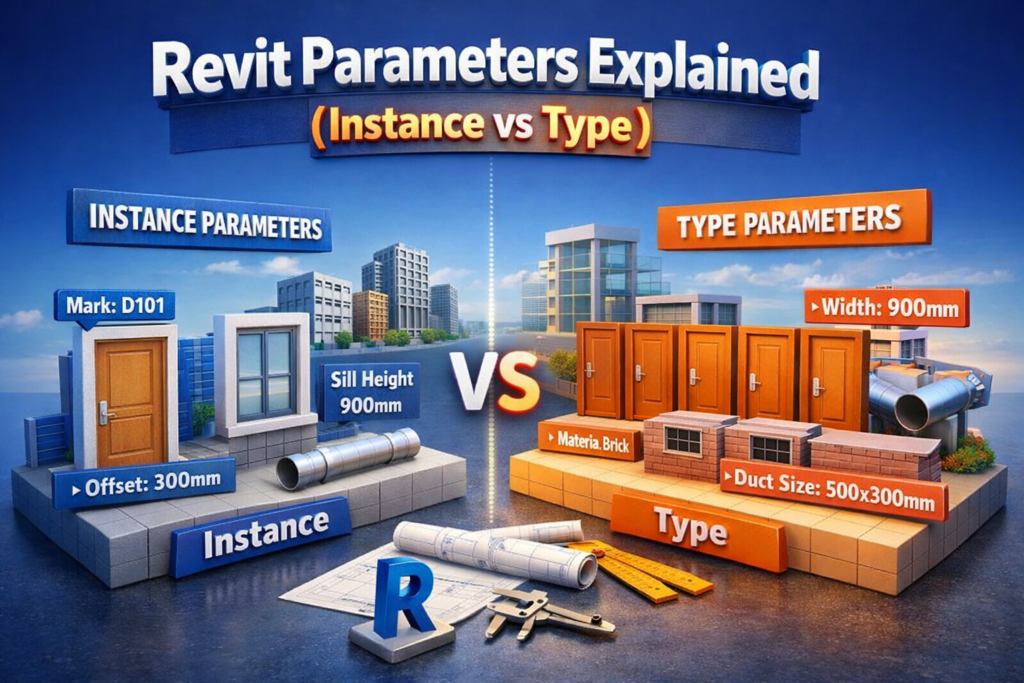
Building Information Modeling (BIM) is not just about drawing walls, placing doors, or modeling ducts. The real intelligence of a BIM model lies in its data. In Autodesk Revit, that data is controlled and managed through parameters. If you truly want to become confident in Revit—whether you work in Architecture, Structure, or MEP—you must understand how parameters work, especially the difference between Instance parameters and Type parameters.
Many beginners struggle with this concept. They change a value and suddenly every similar element updates. Or they modify one element expecting others to change, but nothing happens. The reason behind this confusion is almost always a misunderstanding of Instance vs Type parameters.
This guide will explain everything clearly, step by step, in practical terms.
What Are Parameters in Revit?
In Revit, parameters are data fields attached to elements. They store information such as:
Dimensions (height, width, depth)
Materials
Mark values
Fire rating
Comments
Level constraints
System classifications
Flow values (MEP)
Load values (Electrical)
Whenever you select an element in Revit, the Properties palette shows different fields. Those fields are parameters.
Parameters control:
Geometry
Behavior
Visibility
Scheduling
Tagging
Quantities
Without parameters, a Revit model would just be a 3D drawing. With parameters, it becomes intelligent.
Understanding Instance Parameters What Is an Instance Parameter?
An Instance parameter affects only the selected element. If you change the value, only that specific element updates.
Think of it like editing one specific object in a group.
For example:
You place five doors of the same type.
You change the “Mark” value of one door.
Only that one door changes.
That is an instance parameter in action.
Materials & Finishes in Revit Explained
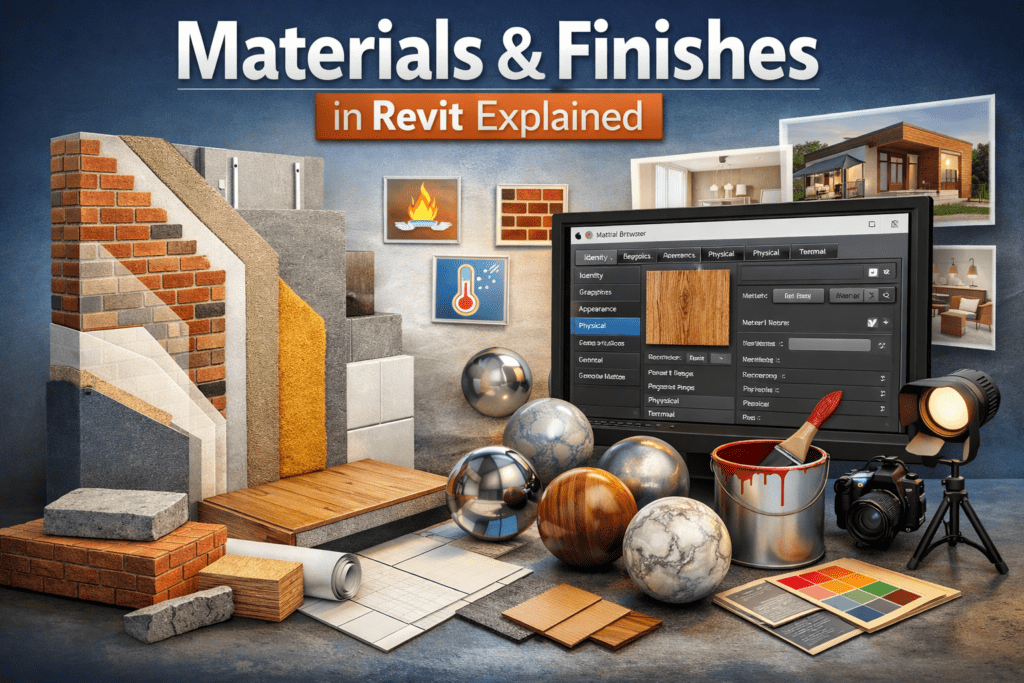
Building Information Modeling (BIM) is not only about walls, doors, and structural elements. A true BIM model reflects how a building looks, feels, and performs in the real world. This is where Materials and Finishes in Revit become extremely important. If you are working in Autodesk Revit, understanding materials properly will improve your renderings, schedules, takeoffs, and presentation quality.
In this detailed guide, we will explore everything you need to know about materials and finishes in Revit—from basic concepts to professional workflow tips.
What Are Materials in Revit?
In Revit, a material is not just a color applied to a surface. It is a data-rich component that controls:
Appearance in realistic views
Surface patterns in plan and section
Cut patterns in section views
Physical properties (thermal, structural)
Identity information (manufacturer, model, cost)
Rendering behavior
When you assign a material to a wall, floor, roof, or family, you are defining both its visual appearance and its technical properties.
For example:
A concrete wall will show proper cut hatch in section.
A wooden floor will display grain texture in 3D realistic view.
A glass material will reflect and transmit light in renderings.
This makes materials one of the most powerful tools inside Revit.
Where to Find and Manage Materials
All materials in Revit are managed inside the Material Browser.
To open it:
Go to Manage Tab
Click on Materials
Inside the Material Browser, you can:
Create new materials
Duplicate existing materials
Edit properties
Assign appearance assets
Manage physical and thermal data
Revit projects usually contain:
Default system materials
Imported materials from families
Custom-created materials
It is good practice to clean and organize materials before starting serious modeling work.
Creating Basic Revit Families
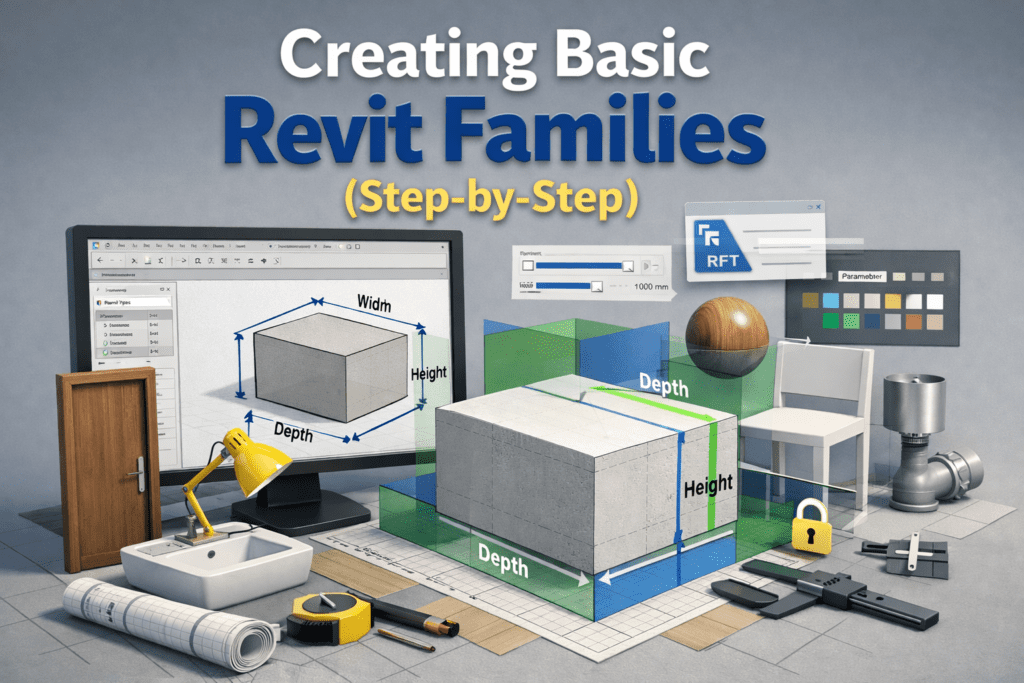
Creating Basic Revit Families is the foundation of every successful BIM project. Whether you are working in Autodesk Revit for architectural, structural, or MEP design, mastering the process of creating basic families is one of the most valuable skills you can develop to improve accuracy, flexibility, and workflow efficiency.
When I first started working with Revit families, I relied heavily on pre-made content. But soon I realized that professional projects demand customization. Clients want specific dimensions, manufacturers provide unique specifications, and site conditions rarely match default content. That’s when learning to create basic families became essential.
In this detailed guide, I will walk you step-by-step through creating basic Revit families in a simple and practical way. No complicated theory — just clear, real-world steps you can follow.
What Is a Revit Family?
In Revit, a family is a group of elements with a common set of properties (parameters) and a related graphical representation.
Examples include:
Doors
Windows
Furniture
Lighting fixtures
Plumbing fixtures
Generic models
Every object you place in a Revit project belongs to a family.
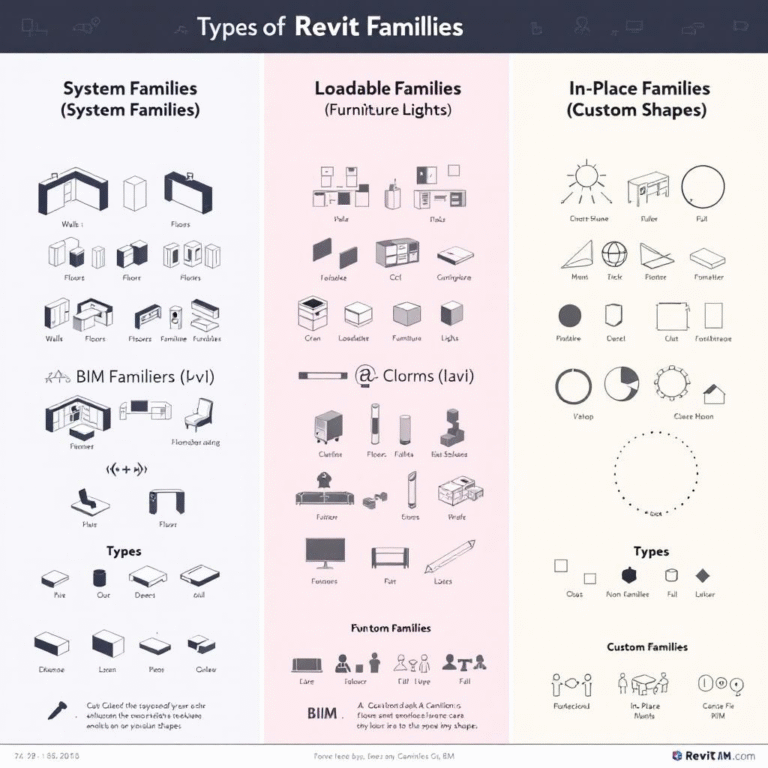
There are three main types:
System Families (Walls, Floors, Roofs)
Loadable Families (Doors, Windows, Furniture)
In-Place Families (Custom elements created inside a project)
In this article, we’ll focus on Loadable Families, which you create in the Family Editor and load into projects.
Step 1: Understanding Family Templates
Before creating a family, you must select the correct template.
How to Load & Use Revit Families
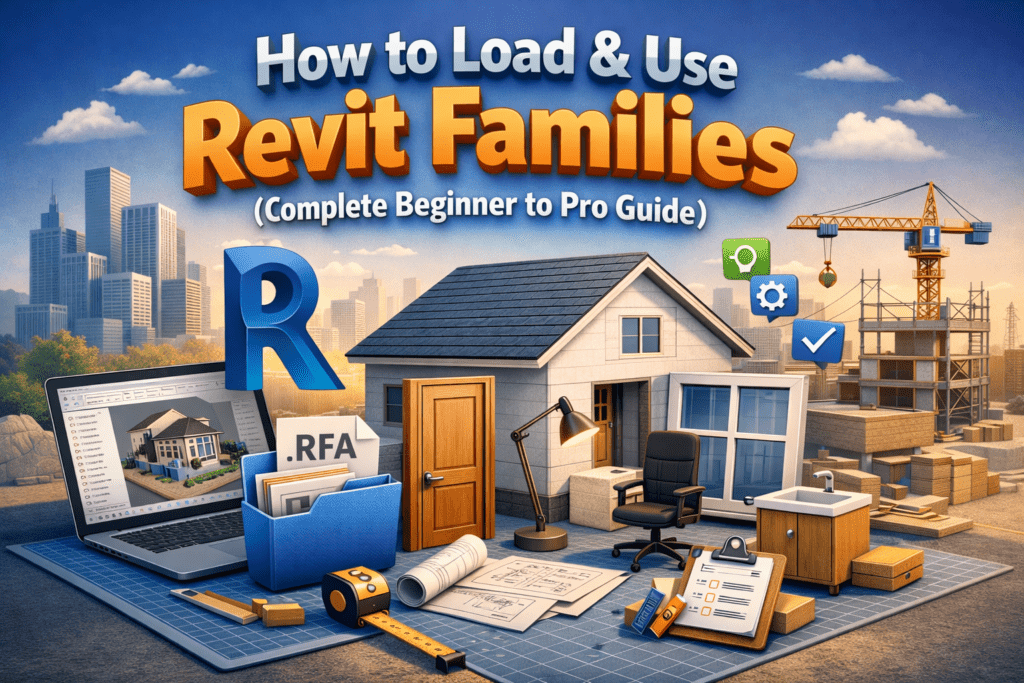
Autodesk Revit works very differently from traditional CAD software. Instead of drawing lines and shapes, Revit uses intelligent building components known as families. If you want to model efficiently, avoid errors, and create professional BIM projects, you must clearly understand how to load and use Revit families correctly.
This guide explains everything step by step—from what Revit families are, to loading them properly, placing them in projects, and using them like a professional BIM modeler
What Are Revit Families?
In Revit, everything you place in a project is a family—doors, windows, furniture, lighting, plumbing fixtures, annotation symbols, and even title blocks.
A Revit family is not just a 3D object. It contains:
Geometry
Parameters
Behavior
Data
That is why Revit models are smart and information-rich.
Types of Revit Families (Quick Overview)
Before loading families, it’s important to understand their types.
Revit Families Explained (System vs Loadable)
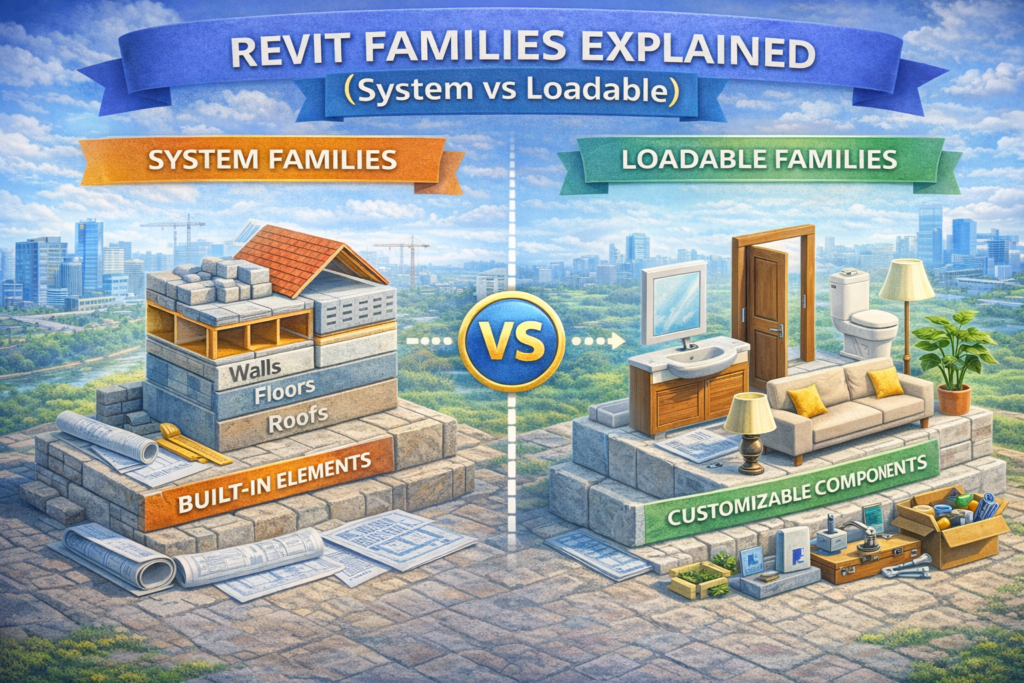
Revit Families Explained (System vs Loadable) is essential knowledge for every Revit user, as families form the backbone of every Revit project. From modeling walls and floors to placing doors and furniture, every element in Revit exists as a family. However, many beginners struggle to understand the difference between system families and loadable families, which often results in confusion, inefficient modeling practices, and poorly optimized projects.
In this guide, we will clearly explain what Revit families are, how System and Loadable families differ, when to use each type, and how understanding them can dramatically improve your workflow.
What Are Revit Families?
In simple terms, a Revit family is a collection of elements with similar behavior, appearance, and parameters. Families define how an object looks, how it behaves, and what information it carries.
For example:
All doors belong to the Door family
All walls belong to the Wall family
All furniture items belong to Furniture families
Every Revit element you place comes from some type of family.
Types of Revit Families
Revit families are divided into three main categories:
System Families
Loadable Families
In-Place Families
This article focuses mainly on System vs Loadable Families, as they make up most of your daily Revit work.
Common Beginner Mistakes in Revit
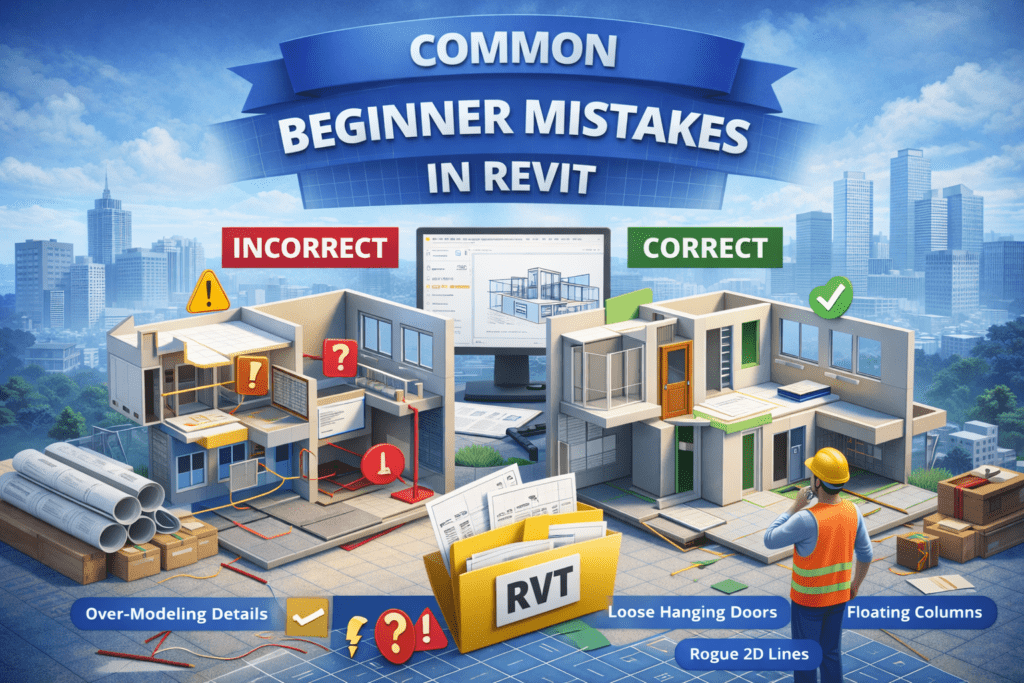
Common Beginner Mistakes in Revit often occur because Autodesk Revit, while a powerful Building Information Modeling (BIM) tool, can feel overwhelming to new users. Many beginners jump straight into modeling without understanding how the software actually works. As a result, these habits lead to slow models, incorrect drawings, coordination issues, and sometimes even complete project failure.
This blog covers the most common beginner mistakes in Revit, explains why they happen, and shows how to avoid them. Whether you are a student, a junior modeler, or a professional transitioning from AutoCAD, this guide will help you build strong Revit foundations.
Understanding Revit Before Modeling Thinking of Revit Like AutoCAD
One of the biggest beginner mistakes is treating Revit as if it were AutoCAD. AutoCAD is a drafting tool, while Revit is a database-driven BIM platform.
Why This Is a Problem
In AutoCAD, lines are just lines. In Revit, every element has data, parameters, and relationships. When beginners draw lines instead of placing walls, floors, or families, they break the BIM workflow.
How to Save, Export & Print in Revit

Autodesk Revit is not just a modeling application; rather, it is a comprehensive Building Information Modeling (BIM) platform that manages geometry, data, and documentation together. Because every element in Revit is interconnected, understanding how to correctly save, export, and print your work becomes essential. Without proper file management, even a well-modeled project can face serious coordination or delivery issues.
This guide explains the complete workflow in a practical manner, helping professionals produce reliable outputs for clients, consultants, and construction teams.
Understanding File Management in Revit
Before using any command, it is important to understand how Revit stores information. Unlike traditional CAD software, Revit works on a database-based system. As a result, changes made in one view automatically affect all other views. Therefore, saving and exporting must be done carefully to maintain data integrity.
How to Save a Project in Revit
Saving is the most basic yet critical operation in Revit. Regular and correct saving protects your work from unexpected crashes or data corruption.
Revit Views Explained
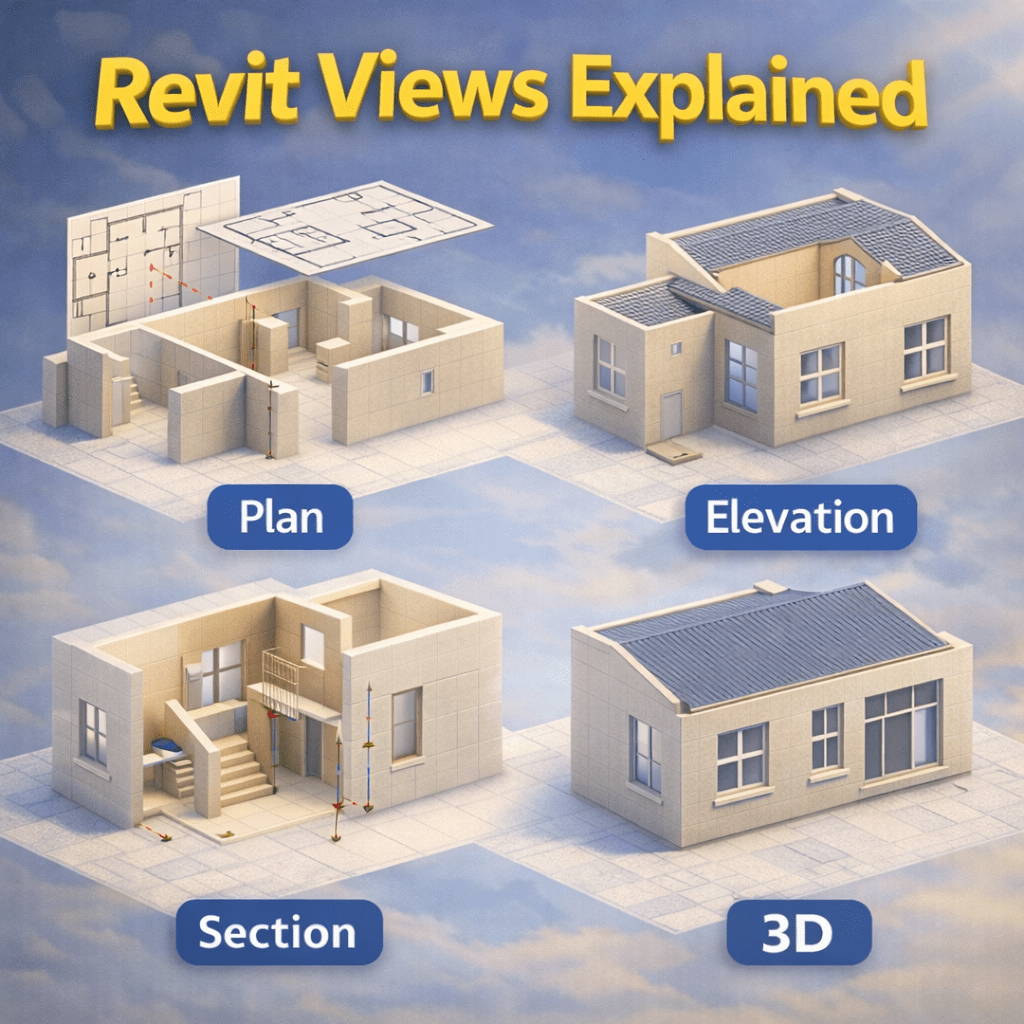
In Building Information Modeling (BIM), views are the backbone of communication. A Revit model may be three-dimensional, but it is the views that allow designers, engineers, and contractors to understand, coordinate, and construct a building accurately. Many beginners struggle not because Revit is difficult, but because they do not fully understand how views work and how each view serves a different purpose.
This blog explains Revit views in detail, focusing on Plan, Section, Elevation, and 3D views. Whether you are a student, a BIM modeler, or a professional trying to refine your workflow, understanding these views will significantly improve your efficiency and model clarity.
Understanding Views in Revit
In Revit, a view is not a copy of the model. Instead, it is a window into the same central model, displayed from different angles or cut planes. Any change made in one view automatically updates all other related views.
This is what makes Revit parametric and powerful—but also confusing for new users.
Why Views Are So Important in Revit
Revit views allow you to:
Model accurately without duplicating work
Produce coordinated drawings
Control visibility and detail for different purposes
Detect errors early in the design stage
A well-managed view system can save hours of rework later in the project.
How to Use Modify Tools in Revit
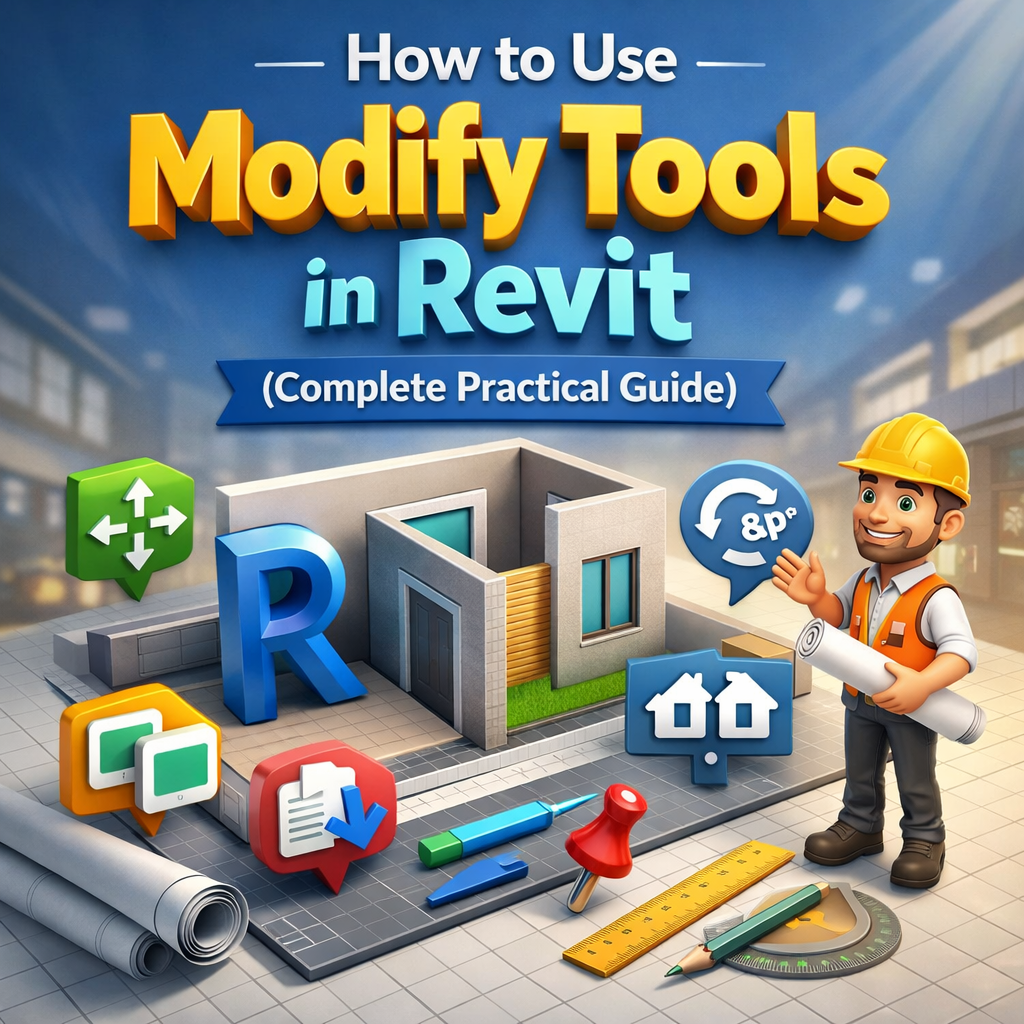
In Building Information Modeling, accuracy and flexibility are essential. While creating elements in a model is important, modifying them correctly is what truly defines professional work. In Autodesk Revit, Modify tools play a critical role in shaping, adjusting, and refining model elements throughout the project lifecycle.
This guide explains how to use Modify Tools in Revit step by step, with practical explanations and real-world usage. Whether you are a beginner or an experienced BIM professional, understanding these tools will significantly improve your workflow, speed, and modeling accuracy.
Understanding Modify Tools in Revit
Modify tools are not separate commands that you activate from a fixed panel. Instead, they appear contextually when you select any element in Revit. This makes them powerful but sometimes confusing for new users.
What Are Modify Tools?
Modify tools allow you to:
Move, rotate, and align elements
Adjust geometry without recreating objects
Maintain model accuracy during design changes
Edit elements while preserving parametric relationships
In short, Modify tools help you change without breaking your model.
Doors and Windows in Revit
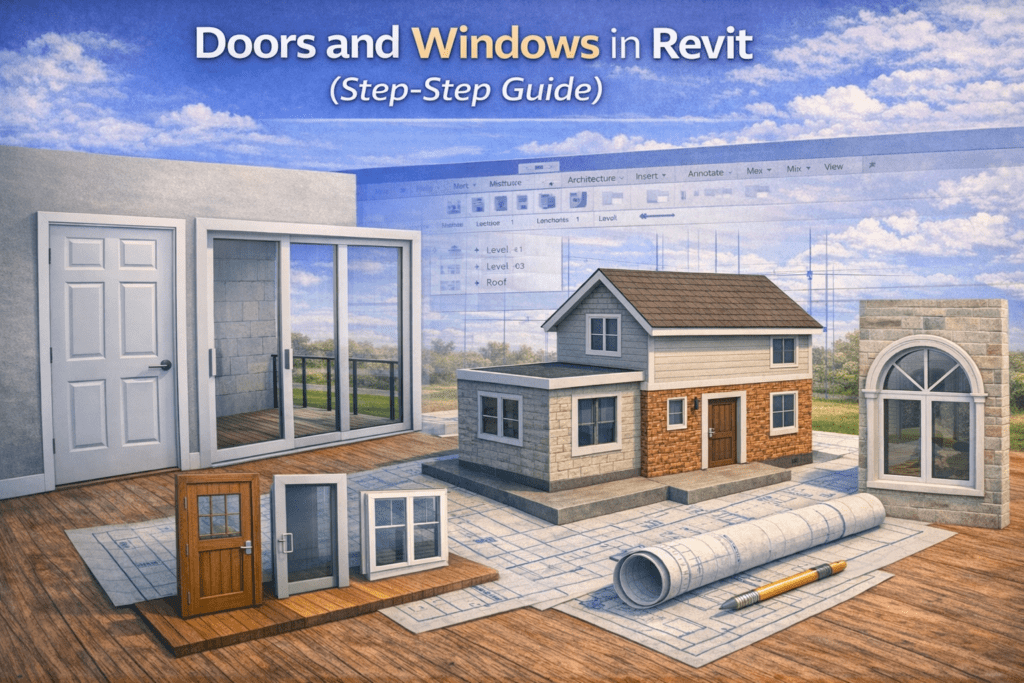
Doors and Windows in Revit are among the most important elements in any building model. They are not just simple components placed in walls; they are intelligent, parametric families that influence schedules, quantities, elevations, sections, and construction documentation.
Many beginners struggle with doors and windows in Revit because they don’t understand how families work, how placement rules apply, or how to customize them properly. This step-by-step guide explains everything clearly—from basics to professional workflows—so you can confidently model doors and windows like an industry professional.
Understanding Doors and Windows in Revit
In Revit, doors and windows belong to the Hosted Family category. This means:
They must be placed inside a wall
They automatically create an opening
They adjust according to wall thickness and type
Unlike AutoCAD blocks, Revit doors and windows are parametric, meaning their size, material, and behavior can change without redrawing them.
Key Differences Between Doors and Windows
Although both are hosted families, there are some differences:
Doors always sit at floor level and usually include swing direction
Windows are placed at a defined sill height above the floor
Doors often require fire rating, hardware, and accessibility data
Windows usually include glass type, sill height, and opening percentage
Understanding these differences helps you select the right family and avoid mistakes later.
How to Draw Walls Floors & Roofs in Revit
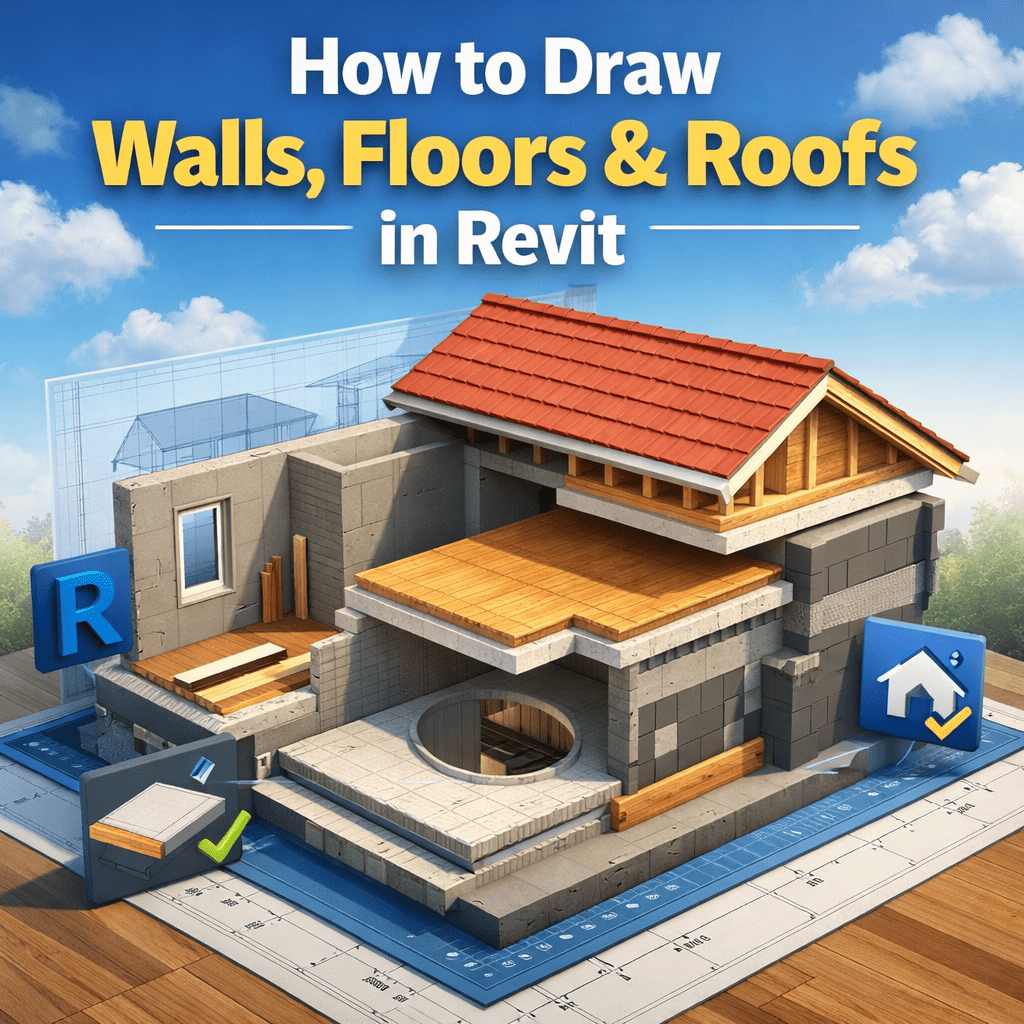
Revit is not just a drafting tool—it’s a full Building Information Modeling (BIM) platform. When learning How to Draw Walls, Floors & Roofs in Revit, you’re not simply sketching lines or shapes; you’re creating intelligent building elements that understand height, thickness, materials, levels, and their relationships with other components.
If you’re new to Revit—or even if you’ve been using it for a while—getting these basics right will save you hours of rework later. In this guide, we’ll walk step by step through how to draw walls, floors, and roofs in Revit, using a practical, real-world approach rather than textbook theory.
Understanding Revit Before You Start Modeling
Before drawing anything, it’s important to understand one core idea: Revit is level-based. Almost everything you model depends on levels.
Why Levels Matter in Revit
Walls, floors, and roofs all reference levels for their base, top, or height. If your levels are wrong, your entire model will feel broken.
Revit Levels & Grids Explained
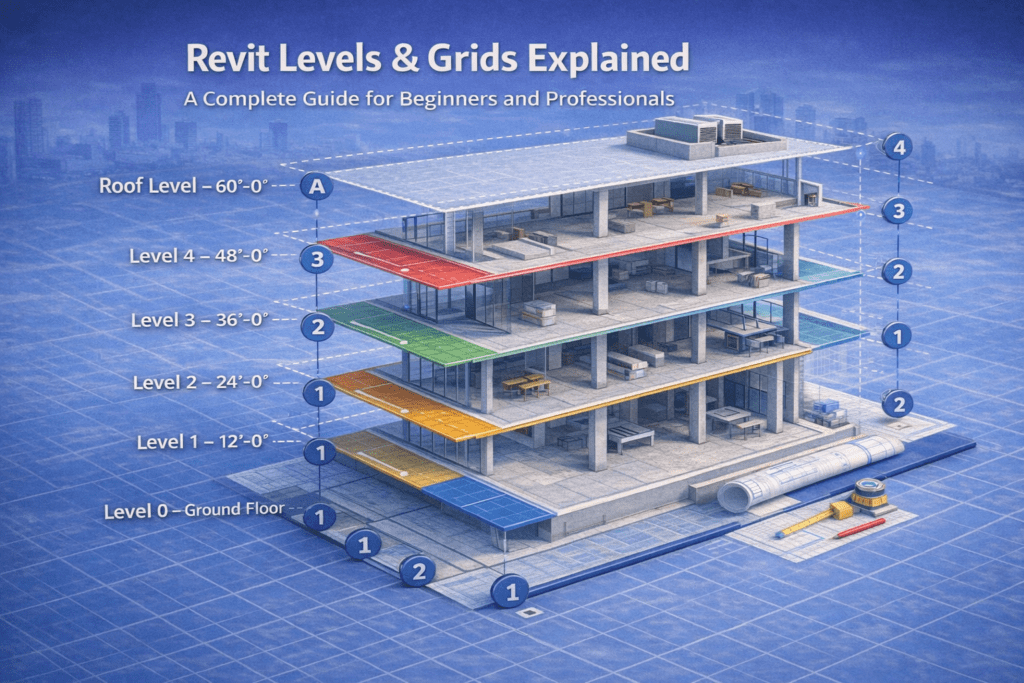
When starting any Revit project, two elements quietly control the entire model: Levels and Grids. Although they appear simple at first glance, incorrect setup can create long-term problems. As a result, even skilled modelers often face rework and coordination issues. In professional BIM workflows, levels and grids act as the backbone of accurate modeling, documentation, and teamwork.
This guide explains Revit Levels and Grids in detail. Along the way, you’ll learn what they are, how they function, and how to apply them correctly in real-world projects.
What Are Levels in Revit?
Levels in Revit define the vertical heights or story elevations of a building. In simple terms, they control where floors, roofs, ceilings, and similar elements are placed. Instead of being just visual lines, levels serve as intelligent references that guide the entire model.
More importantly, levels are data-driven objects. Because of this, they directly influence how elements behave when changes occur.
Why Levels Matter
Levels play a critical role in Revit projects for several reasons:
They host floors, roofs, and ceilings
They define the top and base constraints of walls
They generate floor plan and ceiling plan views
They control vertical coordination across disciplines
Therefore, incorrect levels can easily disrupt the entire project structure.
Revit File Types Explained
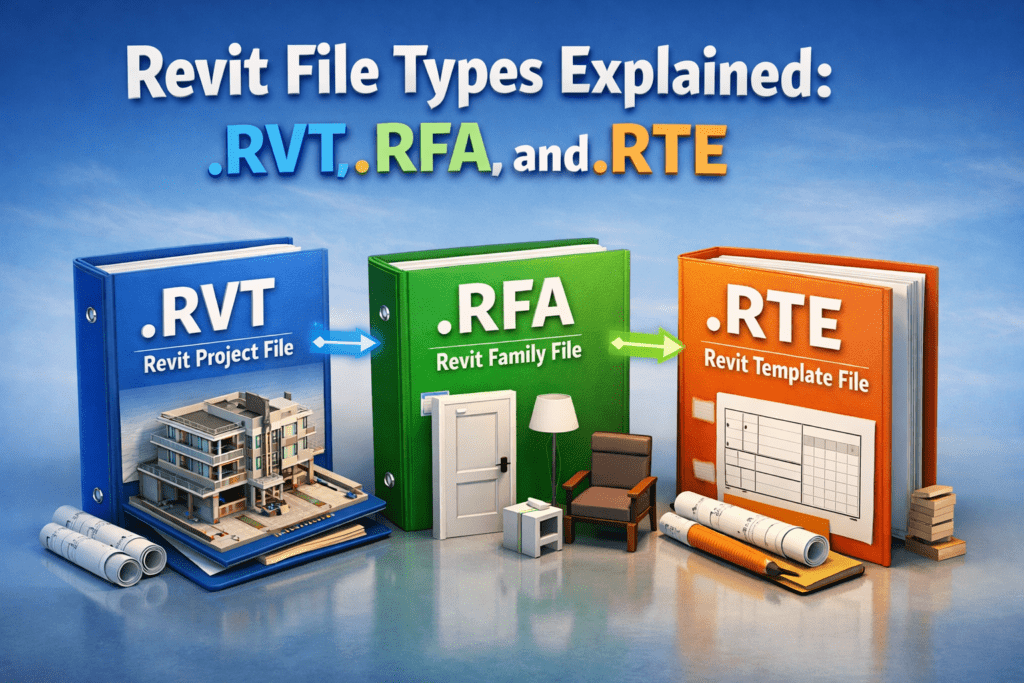
If you are working with Autodesk Revit, you have probably seen different file extensions like .RVT, .RFA, and .RTE. For beginners, these file types can be confusing, and even intermediate users sometimes misuse them, which later causes workflow problems.
Understanding Revit file types is fundamental to working professionally in BIM. Each file type has a specific purpose, and using the right one at the right time can save you hours of rework.
In this blog, we will clearly explain what each Revit file type is, when to use it, and common mistakes to avoid, using simple language and real-world examples.
Why Understanding Revit File Types Is Important
Before diving into individual file types, it is important to understand why this topic matters.
Revit is not just a modeling software; it is a data-driven BIM platform. Every file you create or load plays a role in:
Project organization
Team collaboration
Performance and file size
Standardization across projects
Using the wrong file type can lead to:
Corrupted projects
Missing standards
Poor model performance
Confusion among team members
Now let’s break down each Revit file type one by one.
What Is an .RVT File in Revit? Definition of .RVT File
An .RVT file is a Revit Project File. This is the main working file where the entire building model lives.
It contains:
Architectural elements
Structural components
MEP systems
Views, sheets, schedules, and annotations
In simple words, .RVT is the actual project.
How to Start a New Revit Project
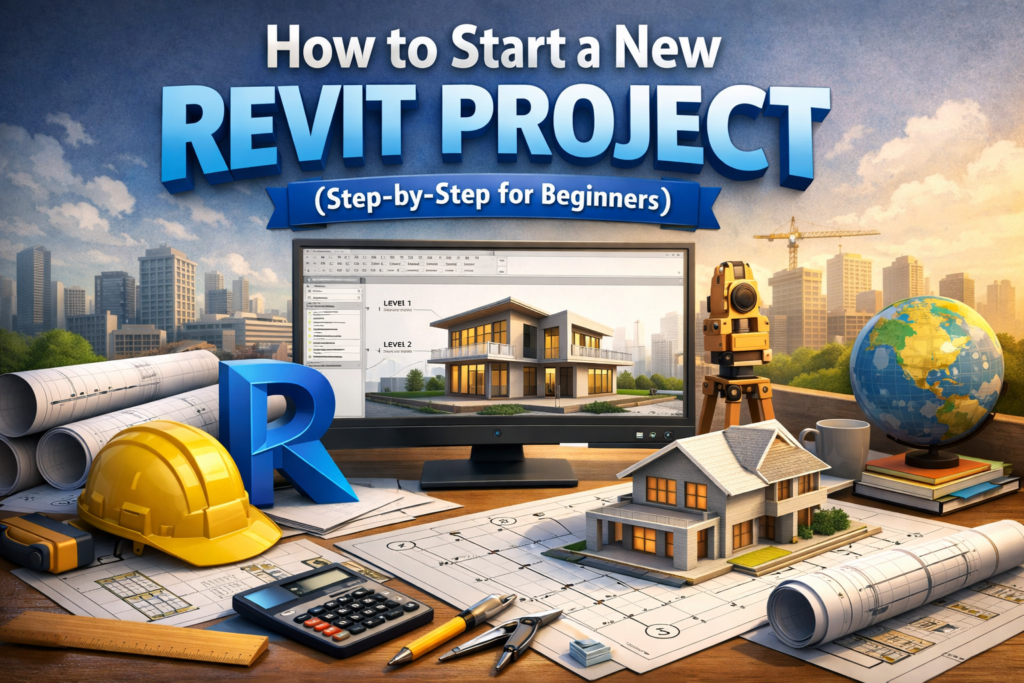
How to Start a New Revit Project the right way can save you hours—or even days—of rework later. Many beginners jump straight into modeling without proper setup, only to realize later that levels are incorrect, templates are messy, or views are poorly organized. In professional BIM workflows, a clean and well-structured Revit project setup is just as important as accurate modeling.
This guide walks you through how to start a new Revit project properly, from choosing the right template to setting up levels, grids, views, and basic project standards. Whether you’re a student, freelancer, or working professional, these steps will help you build a solid foundation for any Revit project.
Why a Proper Revit Project Setup Matters
Before clicking New Project, it’s important to understand why setup matters so much in Revit.
A well-organized project:
Reduces errors during modeling
Makes collaboration easier
Improves performance and file stability
Saves time during documentation
Looks professional to clients and employers
Revit is not just a 3D modeling tool—it’s a data-driven BIM platform. Every early decision affects schedules, drawings, and coordination later.
Why a Proper Revit Project Setup Matters
Before starting, you should know the two main ways to begin a project in Revit.
Revit Interface Explained
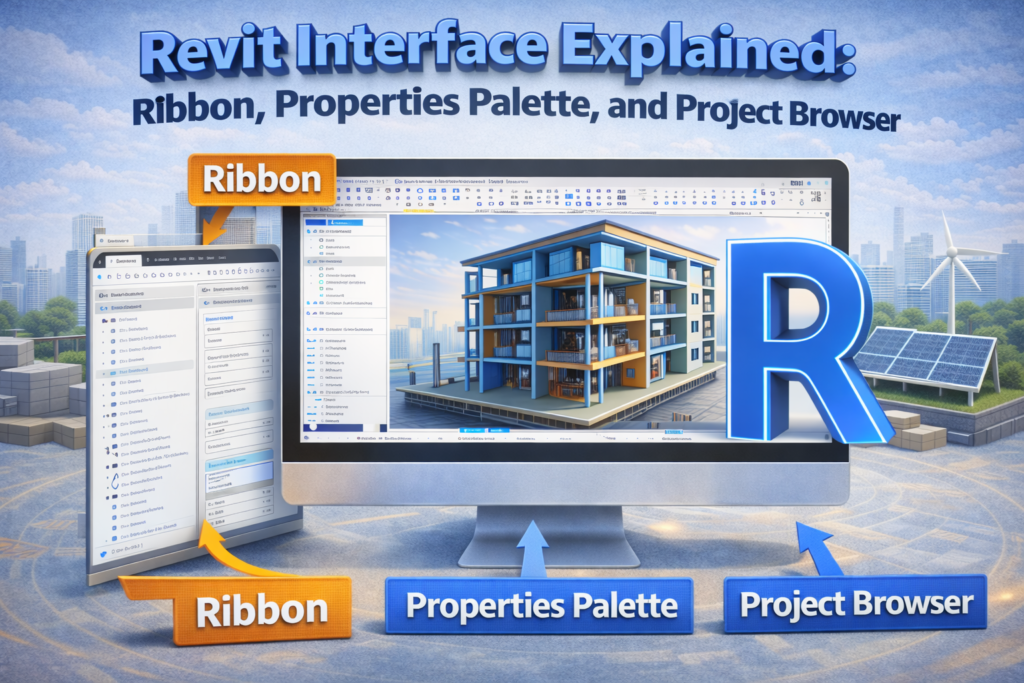
Learning Revit can feel overwhelming at first, especially when you open the software and see so many panels, tabs, and options on the screen. Unlike traditional CAD tools, Revit is not just about drawing lines—it is about building information. To work efficiently, the first thing every beginner and intermediate user must understand is the Revit interface.
In this article, we will explain the Revit interface in detail, focusing on the three most important components: the Ribbon, the Properties Palette, and the Project Browser. Once you understand how these elements work together, your modeling speed, accuracy, and confidence in Revit will improve significantly.
Understanding the Revit Interface
The Revit interface is designed to support Building Information Modeling (BIM). Every tool, panel, and option exists to help you create, manage, and coordinate building data. Unlike AutoCAD, where tools remain mostly static, Revit’s interface is highly contextual. What you see on the screen changes depending on what you are doing and what you have selected.
Key Components of the Revit Interface
Before diving deep, let’s identify the main interface elements:
Ribbon (top of the screen)
Properties Palette (usually on the left or right)
Project Browser (usually below the Properties Palette)
Drawing Area (center workspace)
Status Bar (bottom of the screen)
Among these, the Ribbon, Properties Palette, and Project Browser form the core workflow of Revit. You will use them constantly throughout any project.
What Is BIM? Why Revit Is Important
What Is BIM? Why Revit Is Important is a question many professionals ask as the construction industry continues to evolve rapidly. Today’s buildings are far more complex, requiring project teams to handle architecture, structure, MEP systems, sustainability, and cost control at the same time. Because of this complexity, traditional 2D drawings no longer meet the demands of modern construction projects.
To address these challenges, the industry has adopted Building Information Modeling (BIM). BIM provides a smarter and more coordinated approach to planning, designing, constructing, and managing buildings. This transition clearly highlights what BIM is and why Revit is important, as Revit plays a crucial role in improving accuracy, collaboration, and efficiency within BIM-based workflows.
To fully understand What Is BIM? Why Revit Is Important, it is necessary to first explore the core principles of BIM.
What Is BIM? Meaning of Building Information Modeling
BIM stands for Building Information Modeling. It is a digital process that creates an intelligent 3D model of a building. Unlike simple drawings, BIM models store both geometry and detailed information.
In BIM, designers create walls as real walls, not just lines. Similarly, doors, windows, and systems behave like actual building components. As a result, the model becomes more accurate and reliable.
BIM Is More Than Just 3D Modeling
Although many people associate BIM with 3D visuals, BIM actually represents a complete workflow. It supports every project stage, including:
Planning
Design
Coordination
Construction
Operation and maintenance
Because of this, BIM follows the building throughout its entire lifecycle.
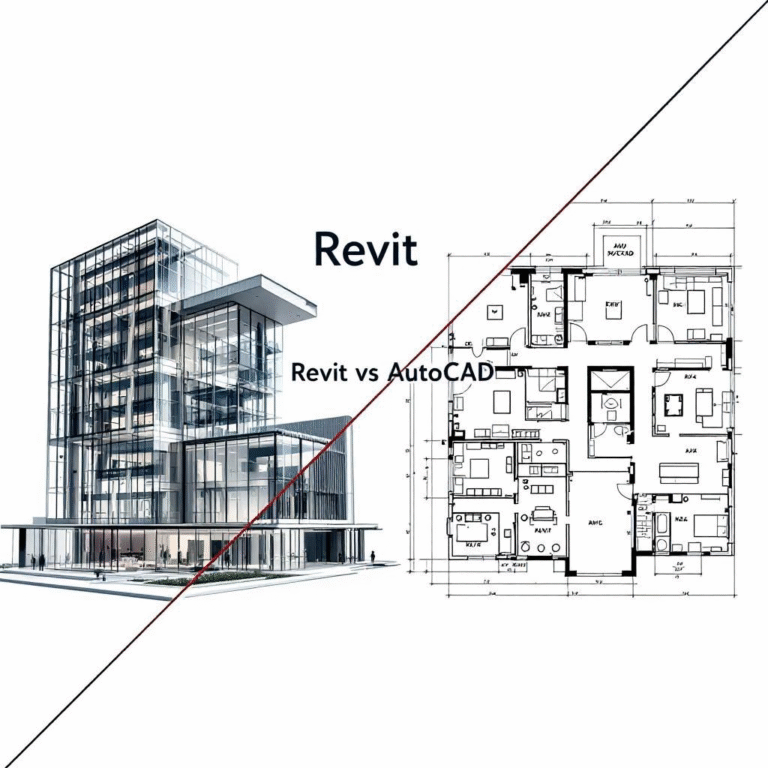
Difference Between AutoCAD and Revit for Beginners
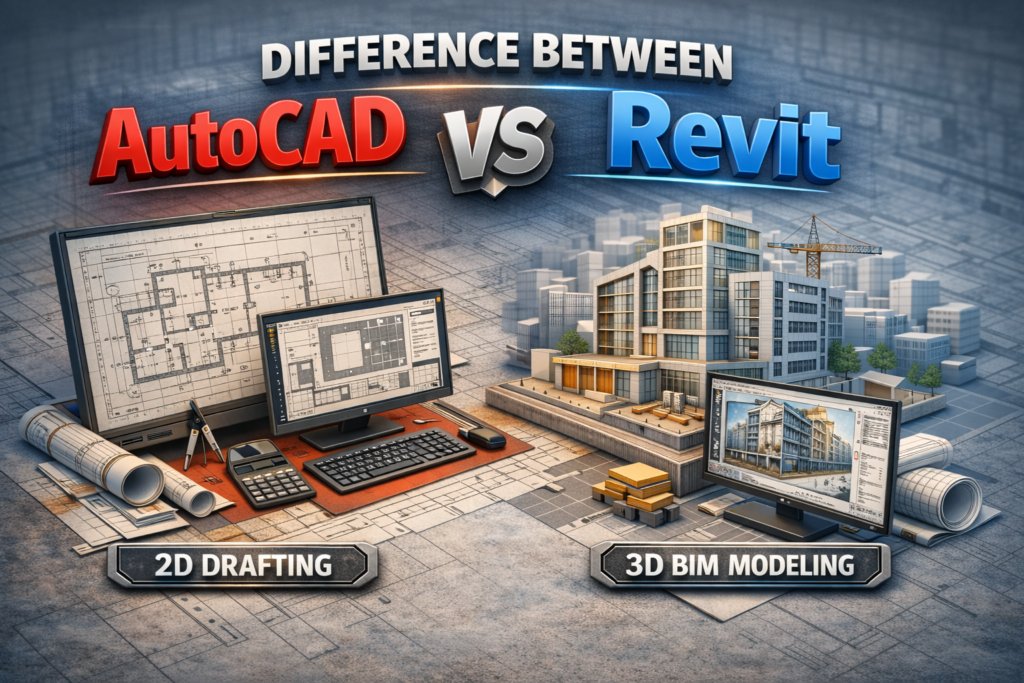
If you are new to the architecture, engineering, or construction industry, you have probably heard the names AutoCAD and Revit many times. Beginners often feel confused about which software to learn first and what the real difference is between the two. Although both tools are widely used in the construction industry, they serve very different purposes.
This guide is written specifically for beginners. By the end of this blog, you will clearly understand what AutoCAD and Revit are, how they work, where they are used, and which one is better for your career goals.
Understanding AutoCAD and Revit Basics
Before comparing both tools, it is important to understand what each software actually does.
What is AutoCAD?
AutoCAD is a computer-aided drafting (CAD) software mainly used for creating accurate 2D drawings and simple 3D shapes. When explaining the Difference Between AutoCAD and Revit for Beginners, AutoCAD is often described as a digital drawing board where users manually create lines, arcs, circles, and other shapes. It has been used for decades and remains popular due to its flexibility, precision, and ease of use for drafting floor plans, sections, elevations, and construction details.
What is Revit? Complete Beginner Guide

If you are new to the world of architecture, engineering, or construction, you have probably heard the name Revit many times. Many beginners feel confused at first and often ask the same question: What is Revit and why is it so important?
This complete beginner guide will explain what is Revit, how it works, who should learn it, and why it has become one of the most powerful tools in the construction industry today. This article is written in simple language so that even a complete beginner can understand it easily.
What is Revit?
Revit is a Building Information Modeling (BIM) software used to design, plan, and manage buildings in a smart and coordinated way. It allows architects, structural engineers, and MEP engineers to work on a single intelligent 3D model instead of separate 2D drawings.
Revit was developed to solve the problems of traditional drafting methods, where drawings were disconnected and changes had to be updated manually. With Revit, everything is connected. If you change one element, the entire model updates automatically.
Revit is developed by Autodesk, the same company that created AutoCAD.
What is BIM?
BIM stands for Building Information Modeling. It is not just a 3D model; it is a process that includes:
Geometry (3D shape of the building)
Materials and finishes
Quantities and measurements
Construction data
Project coordination
BIM allows everyone involved in a project to work from the same source of information.
Floors and Structural Connections Overview

Understanding how floors connect with other structural elements is a fundamental requirement in building design and construction. Floors are not isolated components; they work together with columns, beams, and walls to transfer loads safely to the foundation. A clear floors and structural connections overview helps designers, engineers, and BIM professionals ensure structural integrity, constructability, and long-term durability of buildings.
This blog explains how floors interact with structural members, how connection detailing affects performance and visibility, and how slab edges and floor finishing techniques influence both structure and aesthetics.
Importance of Floors in Structural Systems
Floors serve multiple roles in a building. Structurally, they act as horizontal diaphragms that distribute loads. Functionally, they define usable spaces. A well-designed floor system improves stability, controls deflection, and enhances overall building performance.
In a complete floors and structural connections overview, it is essential to understand:
Load transfer mechanisms
Interaction with vertical and horizontal elements
Detailing at joints and edges
How Floors Interact with Columns, Beams, and Walls Load Transfer Mechanism in Floor Systems
Floor slabs receive loads from occupants, furniture, equipment, and finishes. These loads are transferred through slabs to beams or directly to columns and walls depending on the structural system.
One-way slabs transfer loads primarily in one direction
Two-way slabs distribute loads in both directions
Flat slabs transfer loads directly to columns
Understanding this load path is critical for accurate design and modeling.
Stairs and Railings in Revit: Stair by Component vs Sketch, Railing Customization, and Design Tips
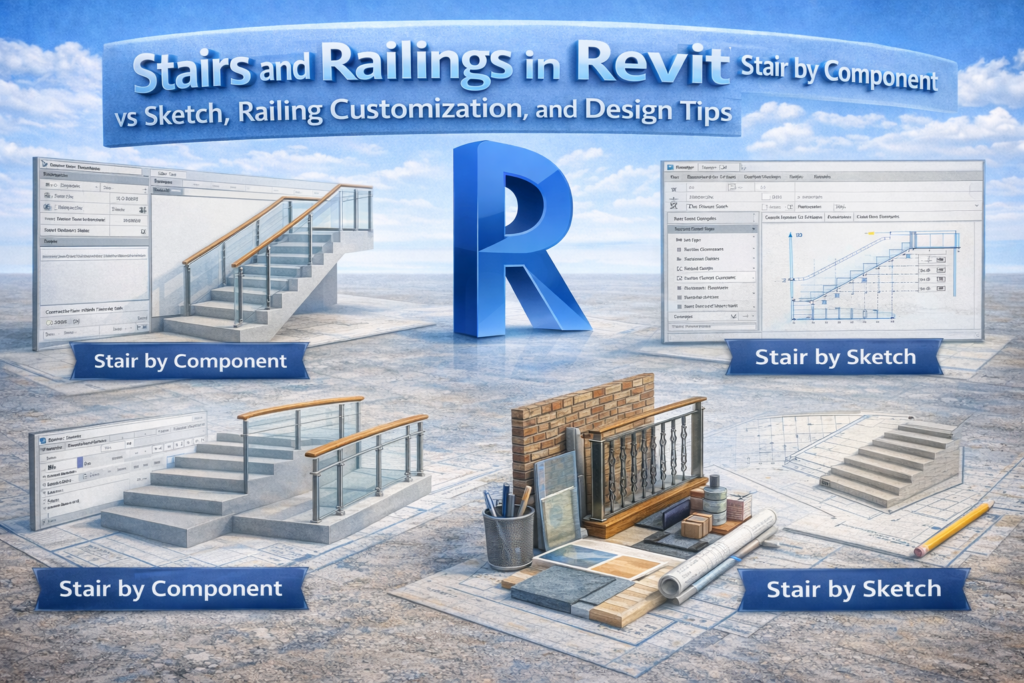
Stairs and railings are more than just vertical circulation elements in a building. They directly affect safety, usability, aesthetics, and coordination between architectural, structural, and MEP disciplines. In Building Information Modeling (BIM), especially in Revit, modeling stairs and railings correctly can save a significant amount of time during documentation and reduce errors during construction.
This blog provides a complete guide to stairs and railings, focusing on Stair by Component vs Stair by Sketch, railing customization and attachment, and practical stair design tips that align with real-world construction standards.
Understanding Stairs and Railings in BIM
In Revit, stairs and railings are intelligent, parametric elements. Unlike basic modeled geometry, they respond to level changes, code requirements, and design modifications automatically.
Proper modeling of stairs and railings helps:
Maintain correct riser and tread calculations
Ensure code compliance
Improve coordination with floors, landings, and railings
Produce accurate schedules and drawings
Before choosing a modeling method, it’s important to understand how Revit handles stairs internally.
Stair by Component vs Stair by Sketch
Revit offers two main methods for creating stairs. Each method has its own strengths and limitations, depending on the project requirements.
Doors and Windows in Revit: Complete Guide from Placement to Custom Families
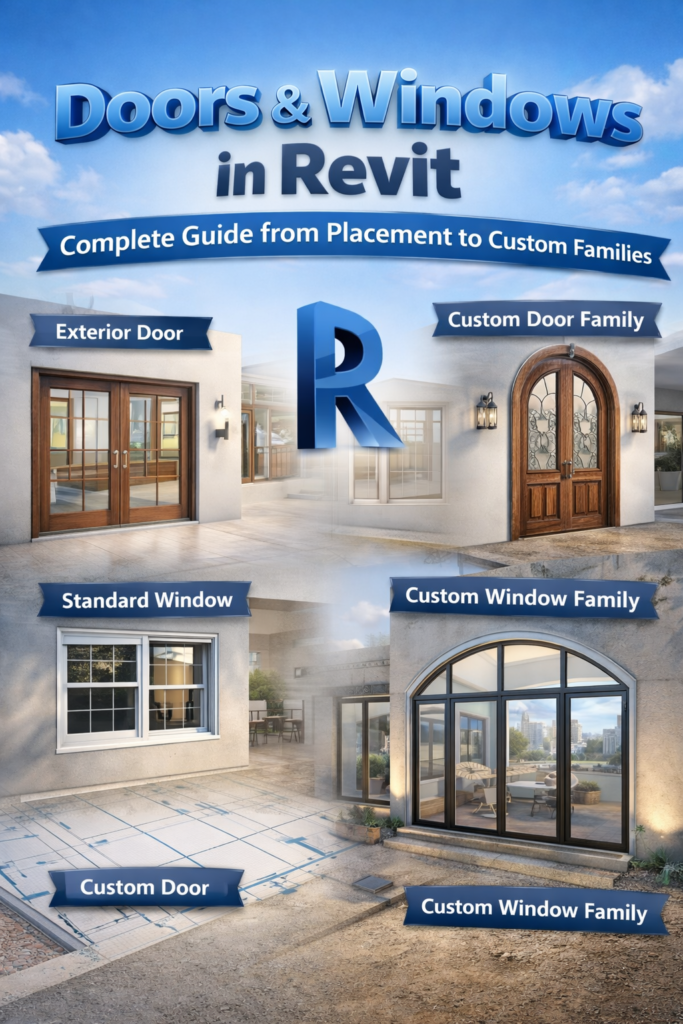
Doors and windows in Revit are not just architectural openings; they are intelligent BIM components that define circulation, lighting, ventilation, safety, and coordination across disciplines. Correctly modeling doors and windows in Revit improves drawing accuracy, schedules, quantities, and construction coordination.
This guide covers everything from inserting doors and windows into walls to creating custom families and controlling size, type, and placement rules using professional BIM workflows.
Understanding Doors and Windows in Revit
Doors and windows in Revit are host-based families, meaning they must be placed inside a host element, typically a wall. Unlike basic CAD blocks, these elements carry data such as dimensions, materials, fire ratings, and swing directions.
Why Doors and Windows Matter in BIM
In BIM workflows, doors and windows are used for:
Floor plan and elevation documentation
Schedules and quantity takeoffs
Coordination with structural and MEP models
Visualization and rendering
Code compliance (clearances, egress, accessibility)
A poorly modeled door or window can cause clashes, incorrect schedules, and approval issues during construction
Beams and Beam Systems in Revit: Placement, Creation, and Visibility Explained
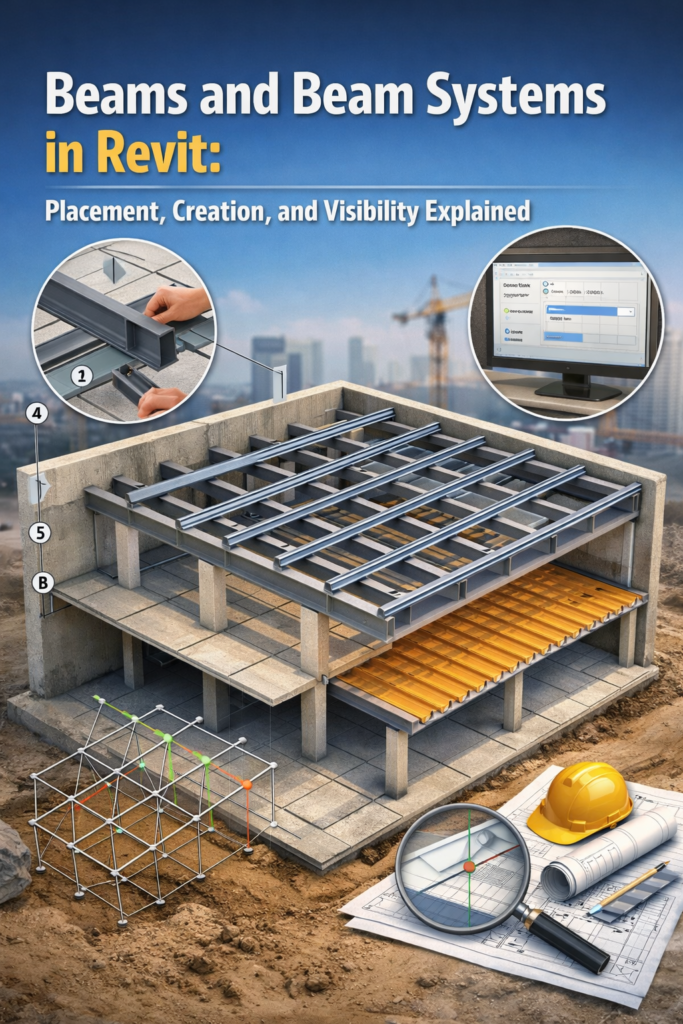
Beams and Beam Systems in Revit play a vital role in any building model, as they support loads, maintain structural stability, and ensure proper coordination between architectural, structural, and MEP disciplines. In a BIM environment, precise modeling goes beyond simply placing elements; it focuses on achieving clarity, seamless coordination, and construction-ready documentation.
This article provides a complete practical guide to beams and beam systems, focusing on beam placement on grids, beam system creation, and beam visibility and analytical settings. Whether you are a beginner or an intermediate Revit user, this guide will help you model beams efficiently and professionally using Autodesk Revit.
Understanding Beams and Beam Systems in Revit
Before diving into modeling techniques, it is important to understand how beams and beam systems function within a BIM workflow.
What Are Structural Beams?
Beam systems are commonly used in floor and roof framing. In addition, they are ideal for repetitive structural layouts and for supporting steel or concrete slab systems.
Beam systems save time, reduce manual errors, and maintain uniform spacing.
Columns in Revit – Architectural & Structural Design Guide
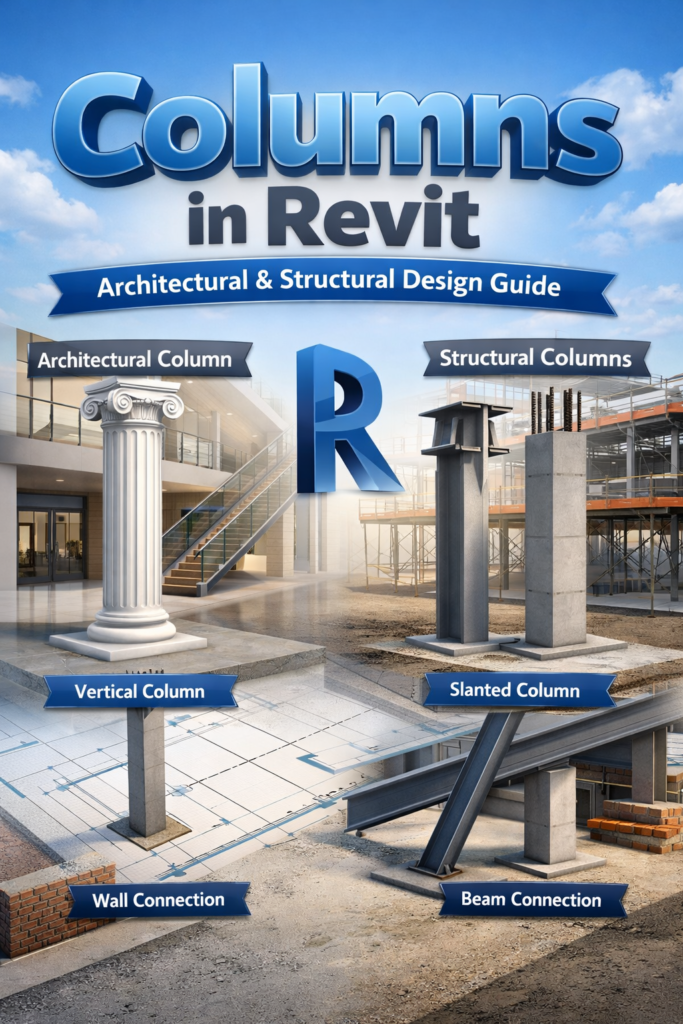
Columns are one of the most important elements in a building model. In Revit, columns are not just vertical supports; they define architectural rhythm, carry structural loads, and connect multiple building systems. Understanding how columns in Revit work—from placement to family types and connections—helps create accurate, professional, and construction-ready BIM models.
Understanding Columns in Revit
Revit categorizes columns into two main types: architectural and structural. Each serves a specific purpose and behaves differently in the model.
Architectural Columns in Revit
Architectural columns are primarily used for design and visual intent. These columns often appear in interior spaces, facades, and decorative elements.
Mastering Roof Modeling in Revit – A Practical Guide for Accurate and Professional Roof Design
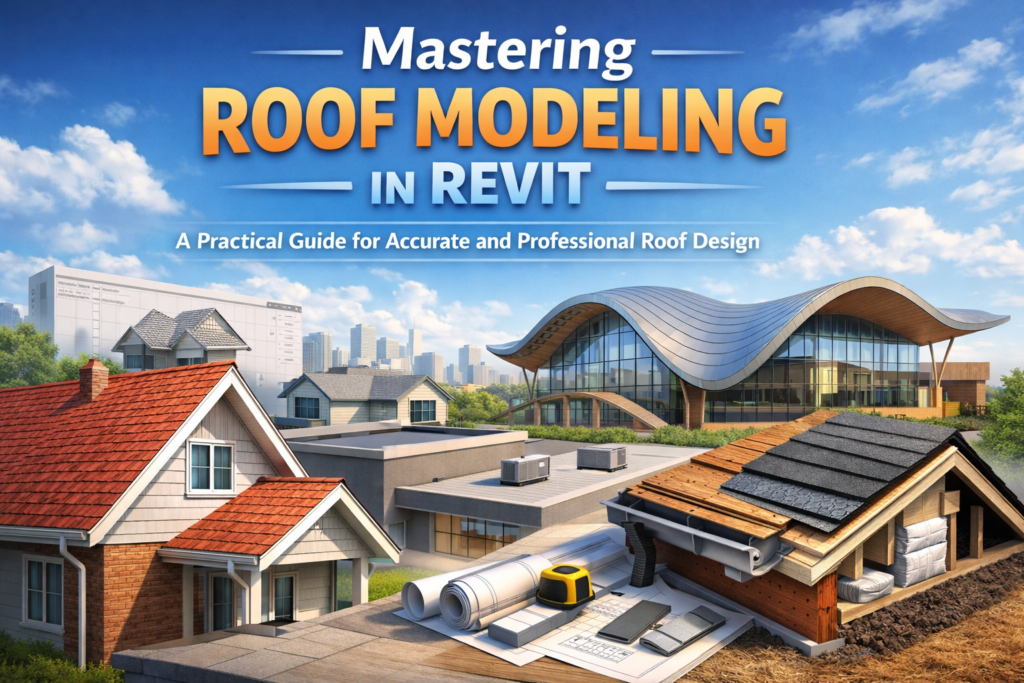
Mastering-roof-modeling-in-revit goes far beyond creating simple sloped surfaces. A well-designed roof defines the character of a building, protects it from weather, supports the structural system, and greatly impacts both appearance and performance. Whether you are designing a small residential house or a complex commercial or modern architectural project, mastering roof modeling in Revit gives you the tools to create accurate, functional, and visually impressive roofs for any building type.
Many beginners feel unsure when working with roofs: Which roof tool should I use? How do slopes really work? Why does my roof cut into the walls? How do I make it look realistic with proper materials and details?
This guide answers all of that in a clear, human-friendly way.
In this blog, you’ll learn when to use each roof method, how to control slopes and overhangs, how to assign realistic roof materials, and how to add construction-level details—so your roofs look professional and behave correctly in drawings, schedules, and sections.
Understanding Roof Tools in Revit
Revit offers several roof creation methods, each designed for a specific type of geometry and design intent. Choosing the right tool at the right time makes your workflow smoother and your model cleaner.
Main Roof Modeling Methods in Revit
Roof by Footprint
Roof by Extrusion
Roof by Face
Roof by Massing (conceptual stage)
In most real-world projects, Roof by Footprint and Roof by Extrusion are used the most. Roof by Face is especially helpful when working with modern, organic, or mass-based designs.
Ceilings in Revit may represent:
Gypsum board ceilings
Acoustic tile ceilings (ACT)
Exposed structural ceilings
Wooden or metal feature ceilings
Floating ceiling clouds
Plenum and service zones
Each ceiling type has different modeling requirements, and Revit supports them through multiple creation methods.
Understanding Types of Floors in Revit
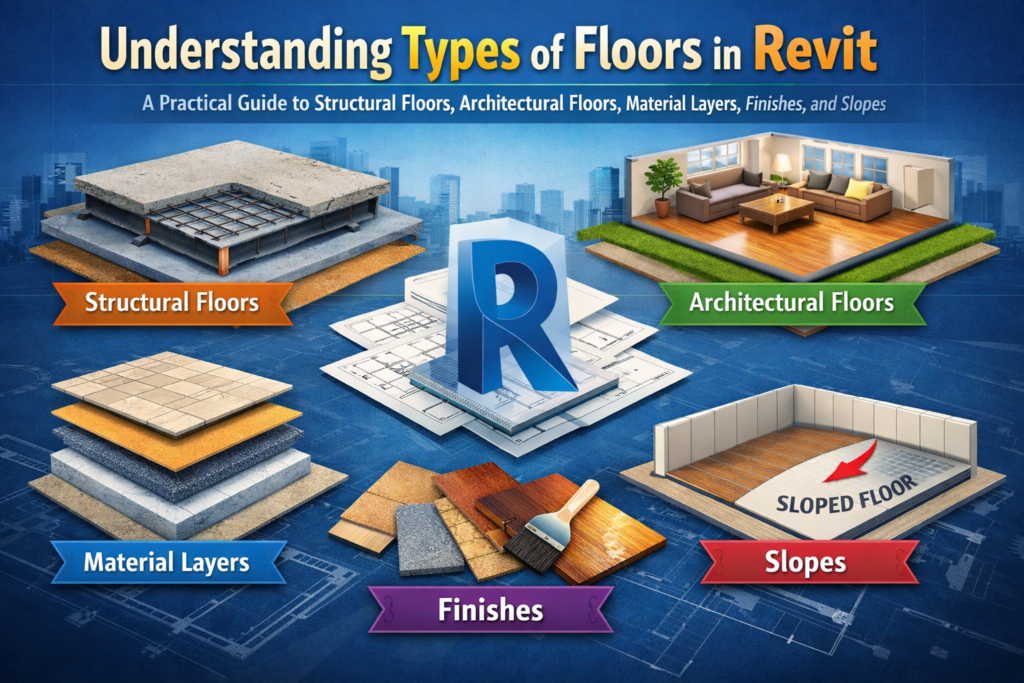
A Practical Guide to Structural Floors, Architectural Floors, Material Layers, Finishes, and Slopes
If you’ve spent any time working in Revit, you already know that floors are much more than flat surfaces. They are systems—sometimes simple, sometimes complex—that influence everything from load distribution and fire ratings to finishes, drainage, and even how spaces feel. Yet for many new (and not-so-new) users, navigating Revit’s floor tools can feel like stepping into a maze. Which floor type should I use? How do layers actually work? What’s the correct way to add a finish? And how do I create slopes without accidentally tilting the entire building?
This post breaks down the essentials: structural vs. architectural floors, compound structures and material layers, and the proper workflow for finishes and slope creation. Whether you’re modeling your first building or refining your BIM workflow, the goal here is clarity—so you can model smarter, faster, and with greater intention.
Let’s start where every Revit user eventually has questions: What exactly is the difference between structural and architectural floors? Structural Floors vs. Architectural Floors in Revit: Why the Difference Matters
On the surface, both floor types look similar. They’re both created from the same floor tool, and visually, they appear identical in 3D. But their purpose—and behavior in documentation—couldn’t be more different.
Structural Floors: The Backbone of the Building
A structural floor is exactly what it sounds like: a load-bearing horizontal system designed to support loads and transfer forces down to the building’s structural frame.
Here’s what distinguishes structural floors in Revit:
- They participate in the analytical model.
This means engineers can use them for structural analysis—load paths, connections, and support conditions. - They include structural parameters.
For instance, they can define structural function, structural usage, and support conditions. - They interact with beams, walls, and columns differently.
Structural floors can become hosts for structural components, and they engage cleanly with the structural framing system. - They often define the base of the slab assembly.
Think cast-in-place concrete, composite metal deck slabs, precast planks, or post-tensioned slabs.
In real projects, the structural engineer usually controls these elements. The architectural model may reference them, but the structural model is often the source of truth.
Architectural Floors: The Finish and Spatial Layer
Architectural floors, on the other hand, focus on interior layout, finishes, circulation, and space definition. They might not carry structural loads, but they play a major role in how a building functions and feels.
Key characteristics include:
- They are used to represent finishes or non-structural layers.
Floor tiles, wood planks, carpets, raised floors, or acoustic underlayment all fall under this category. - They do not participate in structural analysis.
Which keeps things cleaner on the engineering side. - They help define room boundaries.
Rooms use floors as part of their enclosing geometry. - They offer design flexibility.
Architects can easily change materials, thicknesses, and compositions without interfering with structural work.
Floor Creation in Revit
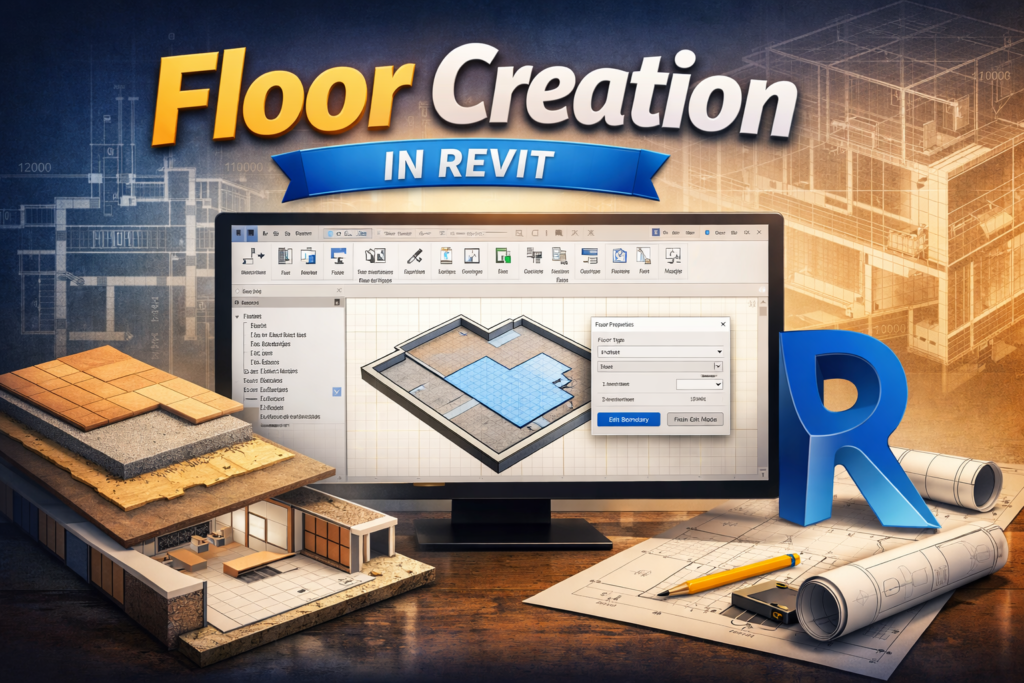
If you’re new to Revit, creating floors is one of the first modeling skills you’ll use again and again. Floors tie the building together—literally—and understanding the different ways to create them will save you a lot of time as your project grows. In this post, I’ll walk through the basics of creating floors, the two main methods you can use, and how to control levels and thickness so your model stays clean and consistent.
How to Create Floors in Revit?
Revit keeps the floor-creation process fairly straightforward. You’ll usually start in a plan view—Level 1 or Level 2—because it’s much easier to sketch and snap to walls from above.
- Go to the Architecture tab.
- Click Floor (Architectural).
- Revit will take you into Sketch Mode, where you define the floor boundary.
- When you’re done, hit the green Finish checkmark.
That’s it. Once the boundary is closed, Revit generates the floor instantly. If the edges overlap walls, Revit might ask if you want the walls to attach to the floor—either option is fine depending on your design intent.
Two Ways to Create Floors: Pick Walls vs. Sketch Boundary
When you enter Sketch Mode, you’ll see several drawing tools on the ribbon. Out of these, two methods are used the most: Pick Walls and Sketch Boundary.
- Pick Walls
Think of this as the “quick and clean” method. When your floor perimeter follows the shape of the building, you can simply click Pick Walls, then select each exterior wall. Revit automatically traces them for you.
This is handy because:
- It’s much faster than sketching manually.
- If you move a wall later and the boundary is locked, the floor updates with it.
- It keeps the floor aligned perfectly with the walls’ finish faces or centerlines (depending on your settings).
This method is ideal for standard building footprints or repetitive levels where the floor edges match the walls.
Revit Families 2025: A Step-By-Step Introduction
If you’ve ever felt overwhelmed by Revit’s Family Editor, you’re not alone. But the truth is — mastering it unlocks one of the most powerful aspects of Revit 2025. This guide walks you through everything you need to know to confidently create, edit, and manage Revit Families — from simple parametric components to advanced loadable models. Whether you’re new to BIM or a seasoned Revit user, this step-by-step tutorial will help you understand Revit Families in a fun, practical way.
What Are Revit Families?
In Revit 2025, every model element belongs to a Family. Families are the DNA of your BIM project — they define how elements behave, appear, and interact. They are organized in a hierarchy: Categories, Families, and Types. For instance, the ‘Walls’ category contains the ‘Basic Wall’ family, which has multiple Types such as ‘Exterior Brick on CMU’ or ‘Interior
Partition’
Revit Family Hierarchy
At the top of Revit’s structure are Categories, which group elements like doors, walls, or furniture. Each category contains Families, and each family contains multiple Types with predefined variations (like different materials or sizes).
Key Revit 2025 Family Terminology
Model Elements: Represent real-world building geometry like walls, beams, or furniture.
Host Elements: Structural elements that support or hold other components, such as walls or floors.
Component Elements: Pre-manufactured or freestanding objects inserted into a project.
Annotation Elements: 2D details like tags, dimensions, and text used for documentation.
Revit Family Libraries and Templates
Revit 2025 comes with extensive built-in family libraries — plus thousands of free and paid options online. Autodesk Revit users can also download content from the official Autodesk Content Library or popular sites like RevitFamiliesHub and BIMObject. You
can use templates such as Generic Model.rft or Casework.rft to start your family creation.
How to Start a Revit Project from Scratch
(Beginner’s Guide 2025)

Starting a project in Revit 2025 from scratch can feel intimidating at first, especially if you’re new to Building Information Modeling (BIM). However, when approached systematically, the process becomes intuitive and efficient. Every model element in Revit carries data, influencing how your design evolves from concept to construction. This guide walks you through the foundational steps — from template selection to families and collaboration — ensuring your first Revit project is well-organized, accurate, and professional.
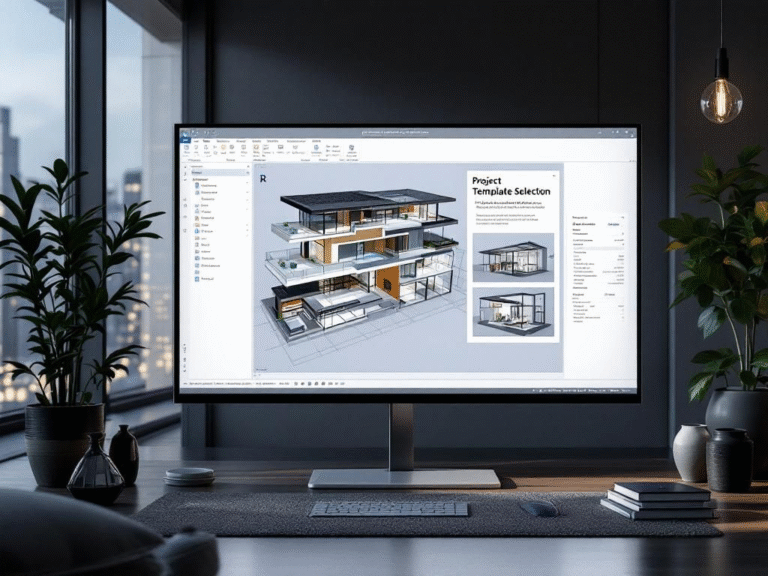
Choosing the Right Template for Your Project
The first step in creating a new Revit 2025 project is selecting the appropriate template. A template determines your available tools, preloaded families, and project standards. Revit offers discipline-specific templates like Architectural, Structural, and MEP. For instance, the Architectural Template includes wall types, room tags, and material libraries, while the
Structural Template focuses on framing and analytical tools. Choosing the wrong template can lead to workflow inefficiencies — such as missing components or incompatible settings. Beginners should always align the template with
their intended discipline. For example, if you plan to design a residential building, start with the Architectural Template. This decision saves time, ensures consistency, and simplifies coordination as the project grows.
Setting Up Project Units and Levels
After choosing a template, configure your units and levels. Revit 2025 allows full customization of measurement units — from meters and millimeters to feet and inches depending on your project’s region or standards. For instance, European projects may use meters, while North American designs typically use feet and inches. Levels define your vertical structure — like floor heights, ceilings, or roof elevations. They form the backbone of your project. Establishing accurate levels ensures all future elements, such as walls and floors, align correctly. Create separate levels for each building story, double-check their placement in elevation views, and name them clearly (e.g., Ground Floor, Level 1, Roof Level). Revit automatically generates floor plans for each level, reducing manual work and improving accuracy.
Planning Applications in the UK: A Complete Guide for Homeowners & Developers

Thinking of building an extension, developing land, or making significant changes to your property? If so, chances are you’ll need to submit a planning application to your local authority.
In this guide, we break down the types of planning permission, costs, processing times, and key considerations—so you can go into the process with confidence and avoid costly mistakes.
What Is a Planning Application?
A planning application is a formal request to your local council seeking permission to carry out building work or changes to a property or land. The process exists to ensure all developments align with local planning policies, preserve the environment, and are appropriate for the character of the area
Common Types of Planning Permission in the UK
Depending on the nature and scale of your proposed development, you may need to apply for a specific type of planning permission:
1. Full Planning Permission
This is the most comprehensive form of permission and is required for:
• New builds
• Large extensions
• Conversions or changes of use (e.g. turning a house into flats)
2. Outline Planning Permission
Outline planning is a preliminary approval that confirms whether the council agrees to the
development in principle. It allows you to test your idea before investing in detailed architectural
plans.
3. Reserved Matters Application
Once you have outline permission, a reserved matters application must follow to get approval
for specific details such as:
• Design
• Materials
• Layout
• Landscaping
4. Listed Building Consent
If your property is a listed building, you must apply for listed building consent before making any changes—even if full planning permission isn’t required. This protects the building’s historical and architectural value
A Complete Guide to Walls in Revit: Types,
Properties, and Best Practices
Walls are one of the most essential elements in any building design, and in Autodesk Revit, they form the backbone of most architectural and structural models. Whether you are designing a simple house, a multi-storey commercial tower, or a detailed BIM model for coordination, walls play a central role in defining spaces, aesthetics, and construction details.
In this blog, we will explore everything you need to know about walls in Revit—from basic wall creation to advanced customization, wall types, properties, and best practices.
- Introduction to Walls in Revit
Walls in Revit are system families, meaning they are pre-built elements that cannot be fully created from scratch but can be customized in various ways. They can be architectural, structural, or even curtain walls depending on the design requirements.
Revit walls are parametric, which means that when you change their properties—such as height, width, or materials—the model updates automatically. This makes walls highly efficient for both design and documentation.
- Types of Walls in Revit
Revit provides different wall categories depending on their function:
2.1 Architectural Walls
These walls are mainly used for design representation and space division. They are not primarily meant to carry structural loads but can include finishes like plaster, paint, tiles, or cladding.
2.2 Structural Walls
Structural walls are load-bearing and essential for the stability of the building. They are usually made of concrete, brick, or blockwork and are integrated with the structural model.
2.3 Curtain Walls
Curtain walls are non-load-bearing, mostly made of glass and aluminum frames. Revit allows detailed customization of curtain wall grids, mullions, and panels. These are commonly used for modern commercial and high-rise buildings.
2.4 Stacked Walls
A stacked wall is a combination of two or more wall types stacked vertically. For example, the lower part could be a concrete wall while the upper part is a brick wall. Revit automatically manages their alignment and joins.
2.5 Compound Walls
Compound walls include multiple layers or materials—such as structural core, insulation, and finish layers. Each layer can be customized in terms of thickness and material properties.
AI Image Generation Prompts for Your Blog
on Revit Walls
- Basic Wall in Revit
Prompt:
“A clean 3D render from Autodesk Revit showing a simple rectangular room with basic architectural walls, neutral colors, realistic lighting, BIM style visualization.”
- Structural vs Architectural Wall
Prompt:
“Side-by-side comparison in Revit of two walls: one structural concrete wall with reinforcement, and one architectural brick wall with plaster finish, BIM modeling style.”
- Curtain Wall Example
Prompt:
“A modern glass curtain wall system modeled in Revit, showing aluminum mullions, clear glass panels, and grid lines, realistic rendering style.”
- Stacked Wall
Prompt:
“A Revit visualization of a stacked wall with a concrete base and brick wall above, detailed section cut with material layers visible, BIM drawing style.”
Revit Families Explained: Types, Uses, and Where to Download Them
What Are Revit Families in BIM?
If you’re working in Autodesk Revit or exploring Building Information Modeling (BIM), you’ve probably heard the term Revit families. But what exactly are they? Revit families are intelligent 3D components used to build digital models of real-world architectural elements. These can be anything from furniture, doors, and windows, to mechanical systems like HVAC units and plumbing fixtures. They aren’t just visual placeholders — they carry parametric data (like size, material, and functionality) that helps create accurate, data-rich building models
Understanding Autodesk Revit: Why It Matters
Before diving deeper, let’s quickly review what Revit is.
Autodesk Revit is a leading BIM software used by architects, engineers, and construction professionals. It allows you to design, plan, and simulate every part of a building in 3D — including construction materials, energy performance, and building systems. Unlike traditional 2D drafting, Revit connects design with real-world data, enabling smarter, faster, and more accurate project delivery.
Types of Revit Families and Their Use Cases
There are three main types of Revit families, each designed for a different purpose.
Choosing the right type ensures a smoother workflow and better model performance.
1.System Families in Revit
These are built into the software and include core structural elements like:
• Walls
• Floors
• Roofs
• Stairs
You can’t create or delete system families outside of Revit—they’re part of the project template
and have predefined behaviors.
2. Loadable Families (Component Families)
These are custom elements created outside of the project and imported when needed. Examples
include:
• Furniture
• Light fixtures
• Appliances
• Doors and windows
They’re flexible, easy to edit, and ideal for reusable design elements.
3. In-Place Families
Used for unique or one-off items designed specifically for a project. These are created directly
inside your model and aren’t meant to be reused across other projects.
AutoCAD vs Revit: Key Differences, Real Life Experience, and Which One to Choose in 2025
My Journey: From AutoCAD to Revit – A Personal Perspective
When I first graduated, AutoCAD was my primary tool for architectural design. I used it professionally for over five years. However, as BIM (Building Information Modeling) grew more essential in the AEC industry, I gradually shifted to Autodesk Revit. At first, Revit felt like a mountain to climb. But after working with it consistently for six years, I now teach BIM fundamentals to new employees and help streamline project workflows. In this article, I’ll share the honest pros and cons of both platforms, pricing comparisons, and answer the ultimate question: Should you transition from AutoCAD to Revit?
Let’s dive in.
Revit vs AutoCAD: Feature-by-Feature Comparison
Here’s how Revit and AutoCAD compare in key areas that matter to architects, interior designers, and engineers.
1. 3D Modeling Capabilities
Winner: Revit
- Revit: Instantly visualize and edit 3D objects. Ideal for architects thinking in volumes and space.
- AutoCAD: Primarily 2D-based. Creating and modifying 3D geometry is possible but not intuitive or efficient.
If you’re designing in 3D or involved in construction planning, Revit saves time and
improves accuracy.
2. Learning Curve and Ease of Use
Winner: AutoCAD
- AutoCAD: Easier to learn and faster to get started with, especially for drafting 2D plansand schematics.
- Revit: Requires a shift in mindset — from drawing lines to modeling parametric objects.
AutoCAD is a great fit for quick 2D tasks. Revit demands deeper understanding but offers bigger rewards.
3. Design Changes and Real-Time Updates
Winner: Revit
- Revit: All project views (floor plans, sections, schedules) update automatically when changes are made.
- AutoCAD: Changes must be made manually in each view or sheet. High risk of errors or inconsistencies.
Revit’s parametric engine makes coordination and revisions effortless compared to AutoCAD.
Top 42+ Revit Tips, Tricks & Productivity Hacks Every User Should Know (Beginner to Pro)

Welcome, Revit beginners, experts, architects, MEP engineers, and BIM enthusiasts! Whether you’re just starting your Revit journey or you’re a seasoned user looking to streamline your workflow, this blog is packed with essential Revit tips, tricks, and hidden hacks to help you work smarter not harder.
Feel free to share your own Revit tips in the comments below. We may feature the best ones in
Boost Your Productivity with These Revit Shortcuts & Tricks
1. Stay Updated
Keep Revit updated with the latest service packs and hotfixes to avoid bugs and improve performance.
2. Keyboard Movement Shortcuts
1. Move objects slightly: Use arrow keys
2. Move objects more: SHIFT + Arrow keys
3. Clean Print Layouts
In the print dialog, check “Hide unreferenced view tags” to keep print sheets tidy.
4. Organize with Named Reference Planes
Name your reference planes—this allows you to select them easily as a work plane.
5. Disable Volume Calculations Temporarily
Turn off volume calculations until you’re ready to export or render. Saves memory!
6. Quick Copy Hack
Hold Ctrl + Drag to duplicate objects quickly.
7. Customize Your Keyboard Shortcuts
Tailor your Revit shortcuts (via KS command) to speed up frequent actions.
8. Clear Revit Cache
Restart Revit after a few hours (like during lunch) to clear cache and prevent sluggish behavior.
9. Rewind Lost Views
Use F8 to rewind and return to the last view state if your view disappears.
10. Pin Important Elements
Pin key elements (e.g., grids, levels, key fixtures) to avoid accidental movement.
️Interface and Display Tips
11. Dual Screen Setup
Stretch Revit across dual monitors by dragging the window edges manually.
12. Avoid Unnecessary 3D
Use 2D symbols for furniture and fixtures unless 3D is absolutely needed.
13. Link 3D Furniture
If 3D models are required, insert them into a linked Revit file to reduce main file size.
14. Zoom Into Your Work Area
Working zoomed-in minimizes Revit’s processing time on complex elements.
15. Limit the Use of Levels
Avoid excessive level creation. Keep only the ones you’re actively using.
Smart Modeling Habits
16. Use Esc to Abort
Command stuck or freezing? Tap Esc repeatedly and confirm “Stop this operation?” when
prompted.
17. Save Often—Very Often!
Revit may crash unexpectedly. Don’t rely on autosave alone.
18. Use Custom 3D Views per Level
Create separate 3D views for each floor using the Section Box—perfect for client presentations.
19. Export Renders to Disk
Always export final renderings to your local drive instead of embedding them in the project.
20. Separate Images into a Dedicated File
Keep all high-res images in a separate .RVT file to prevent bloating your main project.
Revit 2025 Templates Explained: How to Create,
Customize,
and Use Them Effectively
If you’re starting a new project in Revit, one of the most powerful ways to save time and maintain consistency is by using templates. Revit templates define your project’s structure before you evenbegin setting up views, units, title blocks, families, and standards in one place. In this guide, we’ll explore how templates work in Revit 2025, why they’re so important, and how you can create your own customized template for maximum efficiency.
What Is a Revit Template?
A Revit template (.rte file) is a pre-configured file that contains all the basic project settings, styles, and components you need before starting your design. It helps architects, engineers, and designers maintain standardization across multiple projects. A good template can include view templates, title blocks, annotation styles, loaded families, project parameters, and standardized levels and grids
Why Templates Matter
Using a Revit template speeds up project setup, ensures consistent standards, reduces repetitive work, improves collaboration across teams, and supports BIM workflows and data accuracy.
Revit Families 2025: A Step-By-Step Introduction
If you’ve ever felt overwhelmed by Revit’s Family Editor, you’re not alone. But the truth is — mastering it unlocks one of the most powerful aspects of Revit 2025. This guide walks you through everything you need to know to confidently create, edit, and manage Revit Families — from simple parametric components to advanced loadable models. Whether you’re new to BIM or a seasoned Revit user, this step-by-step tutorial will help you understand Revit Families in a fun, practical way.
What Are Revit Families?
In Revit 2025, every model element belongs to a Family. Families are the DNA of your BIM project — they define how elements behave, appear, and interact. They are organized in a hierarchy: Categories, Families, and Types. For instance, the ‘Walls’ category contains the ‘Basic Wall’ family, which has multiple Types such as ‘Exterior Brick on CMU’ or ‘Interior
Partition’
Revit Family Hierarchy
At the top of Revit’s structure are Categories, which group elements like doors, walls, or furniture. Each category contains Families, and each family contains multiple Types with predefined variations (like different materials or sizes).
Key Revit 2025 Family Terminology
Model Elements: Represent real-world building geometry like walls, beams, or furniture.
Host Elements: Structural elements that support or hold other components, such as walls or floors.
Component Elements: Pre-manufactured or freestanding objects inserted into a project.
Annotation Elements: 2D details like tags, dimensions, and text used for documentation.
Revit Family Libraries and Templates
Revit 2025 comes with extensive built-in family libraries — plus thousands of free and paid options online. Autodesk Revit users can also download content from the official Autodesk Content Library or popular sites like RevitFamiliesHub and BIMObject. You
can use templates such as Generic Model.rft or Casework.rft to start your family creation.
How to Start a Revit Project from Scratch
(Beginner’s Guide 2025)
Starting a project in Revit 2025 from scratch can feel intimidating at first, especially if you’re new to Building Information Modeling (BIM). However, when approached systematically, the process becomes intuitive and efficient. Every model element in Revit carries data, influencing how your design evolves from concept to construction. This guide walks you through the foundational steps — from template selection to families and collaboration — ensuring your first Revit project is well-organized, accurate, and professional.
Choosing the Right Template for Your Project
The first step in creating a new Revit 2025 project is selecting the appropriate template. A template determines your available tools, preloaded families, and project standards. Revit offers discipline-specific templates like Architectural, Structural, and MEP. For instance, the Architectural Template includes wall types, room tags, and material libraries, while the
Structural Template focuses on framing and analytical tools. Choosing the wrong template can lead to workflow inefficiencies — such as missing components or incompatible settings. Beginners should always align the template with
their intended discipline. For example, if you plan to design a residential building, start with the Architectural Template. This decision saves time, ensures consistency, and simplifies coordination as the project grows.
Setting Up Project Units and Levels
After choosing a template, configure your units and levels. Revit 2025 allows full customization of measurement units — from meters and millimeters to feet and inches depending on your project’s region or standards. For instance, European projects may use meters, while North American designs typically use feet and inches. Levels define your vertical structure — like floor heights, ceilings, or roof elevations. They form the backbone of your project. Establishing accurate levels ensures all future elements, such as walls and floors, align correctly. Create separate levels for each building story, double-check their placement in elevation views, and name them clearly (e.g., Ground Floor, Level 1, Roof Level). Revit automatically generates floor plans for each level, reducing manual work and improving accuracy.
Planning Applications in the UK: A Complete Guide for Homeowners & Developers
Thinking of building an extension, developing land, or making significant changes to your property? If so, chances are you’ll need to submit a planning application to your local authority.
In this guide, we break down the types of planning permission, costs, processing times, and key considerations—so you can go into the process with confidence and avoid costly mistakes.
What Is a Planning Application?
A planning application is a formal request to your local council seeking permission to carry out building work or changes to a property or land. The process exists to ensure all developments align with local planning policies, preserve the environment, and are appropriate for the character of the area
Common Types of Planning Permission in the UK
Depending on the nature and scale of your proposed development, you may need to apply for a specific type of planning permission:
1. Full Planning Permission
This is the most comprehensive form of permission and is required for:
• New builds
• Large extensions
• Conversions or changes of use (e.g. turning a house into flats)
2. Outline Planning Permission
Outline planning is a preliminary approval that confirms whether the council agrees to the
development in principle. It allows you to test your idea before investing in detailed architectural
plans.
3. Reserved Matters Application
Once you have outline permission, a reserved matters application must follow to get approval
for specific details such as:
• Design
• Materials
• Layout
• Landscaping
4. Listed Building Consent
If your property is a listed building, you must apply for listed building consent before making any changes—even if full planning permission isn’t required. This protects the building’s historical and architectural value
A Complete Guide to Walls in Revit: Types,
Properties, and Best Practices
Walls are one of the most essential elements in any building design, and in Autodesk Revit, they form the backbone of most architectural and structural models. Whether you are designing a simple house, a multi-storey commercial tower, or a detailed BIM model for coordination, walls play a central role in defining spaces, aesthetics, and construction details.
In this blog, we will explore everything you need to know about walls in Revit—from basic wall creation to advanced customization, wall types, properties, and best practices.
- Introduction to Walls in Revit
Walls in Revit are system families, meaning they are pre-built elements that cannot be fully created from scratch but can be customized in various ways. They can be architectural, structural, or even curtain walls depending on the design requirements.
Revit walls are parametric, which means that when you change their properties—such as height, width, or materials—the model updates automatically. This makes walls highly efficient for both design and documentation.
- Types of Walls in Revit
Revit provides different wall categories depending on their function:
2.1 Architectural Walls
These walls are mainly used for design representation and space division. They are not primarily meant to carry structural loads but can include finishes like plaster, paint, tiles, or cladding.
2.2 Structural Walls
Structural walls are load-bearing and essential for the stability of the building. They are usually made of concrete, brick, or blockwork and are integrated with the structural model.
2.3 Curtain Walls
Curtain walls are non-load-bearing, mostly made of glass and aluminum frames. Revit allows detailed customization of curtain wall grids, mullions, and panels. These are commonly used for modern commercial and high-rise buildings.
2.4 Stacked Walls
A stacked wall is a combination of two or more wall types stacked vertically. For example, the lower part could be a concrete wall while the upper part is a brick wall. Revit automatically manages their alignment and joins.
2.5 Compound Walls
Compound walls include multiple layers or materials—such as structural core, insulation, and finish layers. Each layer can be customized in terms of thickness and material properties.
AI Image Generation Prompts for Your Blog
on Revit Walls
- Basic Wall in Revit
Prompt:
“A clean 3D render from Autodesk Revit showing a simple rectangular room with basic architectural walls, neutral colors, realistic lighting, BIM style visualization.”
- Structural vs Architectural Wall
Prompt:
“Side-by-side comparison in Revit of two walls: one structural concrete wall with reinforcement, and one architectural brick wall with plaster finish, BIM modeling style.”
- Curtain Wall Example
Prompt:
“A modern glass curtain wall system modeled in Revit, showing aluminum mullions, clear glass panels, and grid lines, realistic rendering style.”
- Stacked Wall
Prompt:
“A Revit visualization of a stacked wall with a concrete base and brick wall above, detailed section cut with material layers visible, BIM drawing style.”
Revit Families Explained: Types, Uses, and Where to Download Them
What Are Revit Families in BIM?
If you’re working in Autodesk Revit or exploring Building Information Modeling (BIM), you’ve probably heard the term Revit families. But what exactly are they? Revit families are intelligent 3D components used to build digital models of real-world architectural elements. These can be anything from furniture, doors, and windows, to mechanical systems like HVAC units and plumbing fixtures. They aren’t just visual placeholders — they carry parametric data (like size, material, and functionality) that helps create accurate, data-rich building models
Understanding Autodesk Revit: Why It Matters
Before diving deeper, let’s quickly review what Revit is.
Autodesk Revit is a leading BIM software used by architects, engineers, and construction professionals. It allows you to design, plan, and simulate every part of a building in 3D — including construction materials, energy performance, and building systems. Unlike traditional 2D drafting, Revit connects design with real-world data, enabling smarter, faster, and more accurate project delivery.
Types of Revit Families and Their Use Cases
There are three main types of Revit families, each designed for a different purpose.
Choosing the right type ensures a smoother workflow and better model performance.
1.System Families in Revit
These are built into the software and include core structural elements like:
• Walls
• Floors
• Roofs
• Stairs
You can’t create or delete system families outside of Revit—they’re part of the project template
and have predefined behaviors.
2. Loadable Families (Component Families)
These are custom elements created outside of the project and imported when needed. Examples
include:
• Furniture
• Light fixtures
• Appliances
• Doors and windows
They’re flexible, easy to edit, and ideal for reusable design elements.
3. In-Place Families
Used for unique or one-off items designed specifically for a project. These are created directly
inside your model and aren’t meant to be reused across other projects.
AutoCAD vs Revit: Key Differences, Real Life Experience, and Which One to Choose in 2025
My Journey: From AutoCAD to Revit – A Personal Perspective
When I first graduated, AutoCAD was my primary tool for architectural design. I used it professionally for over five years. However, as BIM (Building Information Modeling) grew more essential in the AEC industry, I gradually shifted to Autodesk Revit. At first, Revit felt like a mountain to climb. But after working with it consistently for six years, I now teach BIM fundamentals to new employees and help streamline project workflows. In this article, I’ll share the honest pros and cons of both platforms, pricing comparisons, and answer the ultimate question: Should you transition from AutoCAD to Revit?
Let’s dive in.
Revit vs AutoCAD: Feature-by-Feature Comparison
Here’s how Revit and AutoCAD compare in key areas that matter to architects, interior designers, and engineers.
1. 3D Modeling Capabilities
Winner: Revit
- Revit: Instantly visualize and edit 3D objects. Ideal for architects thinking in volumes and space.
- AutoCAD: Primarily 2D-based. Creating and modifying 3D geometry is possible but not intuitive or efficient.
If you’re designing in 3D or involved in construction planning, Revit saves time and
improves accuracy.
2. Learning Curve and Ease of Use
Winner: AutoCAD
- AutoCAD: Easier to learn and faster to get started with, especially for drafting 2D plansand schematics.
- Revit: Requires a shift in mindset — from drawing lines to modeling parametric objects.
AutoCAD is a great fit for quick 2D tasks. Revit demands deeper understanding but offers bigger rewards.
3. Design Changes and Real-Time Updates
Winner: Revit
- Revit: All project views (floor plans, sections, schedules) update automatically when changes are made.
- AutoCAD: Changes must be made manually in each view or sheet. High risk of errors or inconsistencies.
Revit’s parametric engine makes coordination and revisions effortless compared to AutoCAD.
Top 42+ Revit Tips, Tricks & Productivity Hacks Every User Should Know (Beginner to Pro)
Welcome, Revit beginners, experts, architects, MEP engineers, and BIM enthusiasts! Whether you’re just starting your Revit journey or you’re a seasoned user looking to streamline your workflow, this blog is packed with essential Revit tips, tricks, and hidden hacks to help you work smarter not harder.
Feel free to share your own Revit tips in the comments below. We may feature the best ones in
Boost Your Productivity with These Revit Shortcuts & Tricks
1. Stay Updated
Keep Revit updated with the latest service packs and hotfixes to avoid bugs and improve performance.
2. Keyboard Movement Shortcuts
1. Move objects slightly: Use arrow keys
2. Move objects more: SHIFT + Arrow keys
3. Clean Print Layouts
In the print dialog, check “Hide unreferenced view tags” to keep print sheets tidy.
4. Organize with Named Reference Planes
Name your reference planes—this allows you to select them easily as a work plane.
5. Disable Volume Calculations Temporarily
Turn off volume calculations until you’re ready to export or render. Saves memory!
6. Quick Copy Hack
Hold Ctrl + Drag to duplicate objects quickly.
7. Customize Your Keyboard Shortcuts
Tailor your Revit shortcuts (via KS command) to speed up frequent actions.
8. Clear Revit Cache
Restart Revit after a few hours (like during lunch) to clear cache and prevent sluggish behavior.
9. Rewind Lost Views
Use F8 to rewind and return to the last view state if your view disappears.
10. Pin Important Elements
Pin key elements (e.g., grids, levels, key fixtures) to avoid accidental movement.
️Interface and Display Tips
11. Dual Screen Setup
Stretch Revit across dual monitors by dragging the window edges manually.
12. Avoid Unnecessary 3D
Use 2D symbols for furniture and fixtures unless 3D is absolutely needed.
13. Link 3D Furniture
If 3D models are required, insert them into a linked Revit file to reduce main file size.
14. Zoom Into Your Work Area
Working zoomed-in minimizes Revit’s processing time on complex elements.
15. Limit the Use of Levels
Avoid excessive level creation. Keep only the ones you’re actively using.
Smart Modeling Habits
16. Use Esc to Abort
Command stuck or freezing? Tap Esc repeatedly and confirm “Stop this operation?” when
prompted.
17. Save Often—Very Often!
Revit may crash unexpectedly. Don’t rely on autosave alone.
18. Use Custom 3D Views per Level
Create separate 3D views for each floor using the Section Box—perfect for client presentations.
19. Export Renders to Disk
Always export final renderings to your local drive instead of embedding them in the project.
20. Separate Images into a Dedicated File
Keep all high-res images in a separate .RVT file to prevent bloating your main project.
Revit 2025 Templates Explained: How to Create,
Customize,
and Use Them Effectively
If you’re starting a new project in Revit, one of the most powerful ways to save time and maintain consistency is by using templates. Revit templates define your project’s structure before you evenbegin setting up views, units, title blocks, families, and standards in one place. In this guide, we’ll explore how templates work in Revit 2025, why they’re so important, and how you can create your own customized template for maximum efficiency.
What Is a Revit Template?
A Revit template (.rte file) is a pre-configured file that contains all the basic project settings, styles, and components you need before starting your design. It helps architects, engineers, and designers maintain standardization across multiple projects. A good template can include view templates, title blocks, annotation styles, loaded families, project parameters, and standardized levels and grids
Why Templates Matter
Using a Revit template speeds up project setup, ensures consistent standards, reduces repetitive work, improves collaboration across teams, and supports BIM workflows and data accuracy.
Revit Families 2025: A Step-By-Step Introduction
If you’ve ever felt overwhelmed by Revit’s Family Editor, you’re not alone. But the truth is — mastering it unlocks one of the most powerful aspects of Revit 2025. This guide walks you through everything you need to know to confidently create, edit, and manage Revit Families — from simple parametric components to advanced loadable models. Whether you’re new to BIM or a seasoned Revit user, this step-by-step tutorial will help you understand Revit Families in a fun, practical way.
What Are Revit Families?
In Revit 2025, every model element belongs to a Family. Families are the DNA of your BIM project — they define how elements behave, appear, and interact. They are organized in a hierarchy: Categories, Families, and Types. For instance, the ‘Walls’ category contains the ‘Basic Wall’ family, which has multiple Types such as ‘Exterior Brick on CMU’ or ‘Interior
Partition’
Revit Family Hierarchy
At the top of Revit’s structure are Categories, which group elements like doors, walls, or furniture. Each category contains Families, and each family contains multiple Types with predefined variations (like different materials or sizes).
Key Revit 2025 Family Terminology
Model Elements: Represent real-world building geometry like walls, beams, or furniture.
Host Elements: Structural elements that support or hold other components, such as walls or floors.
Component Elements: Pre-manufactured or freestanding objects inserted into a project.
Annotation Elements: 2D details like tags, dimensions, and text used for documentation.
Revit Family Libraries and Templates
Revit 2025 comes with extensive built-in family libraries — plus thousands of free and paid options online. Autodesk Revit users can also download content from the official Autodesk Content Library or popular sites like RevitFamiliesHub and BIMObject. You
can use templates such as Generic Model.rft or Casework.rft to start your family creation.