Doors and Windows in Revit (Step-by-Step Guide)
Doors and Windows in Revit are among the most important elements in any building model. They are not just simple components placed in walls; they are intelligent, parametric families that influence schedules, quantities, elevations, sections, and construction documentation.
Many beginners struggle with doors and windows in Revit because they don’t understand how families work, how placement rules apply, or how to customize them properly. This step-by-step guide explains everything clearly—from basics to professional workflows—so you can confidently model doors and windows like an industry professional.
Understanding Doors and Windows in Revit
In Revit, doors and windows belong to the Hosted Family category. This means:
-
They must be placed inside a wall
-
They automatically create an opening
-
They adjust according to wall thickness and type
Unlike AutoCAD blocks, Revit doors and windows are parametric, meaning their size, material, and behavior can change without redrawing them.
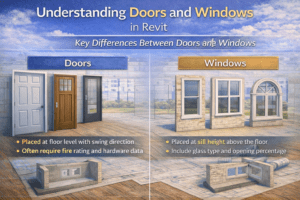
Key Differences Between Doors and Windows
Although both are hosted families, there are some differences:
-
Doors always sit at floor level and usually include swing direction
-
Windows are placed at a defined sill height above the floor
-
Doors often require fire rating, hardware, and accessibility data
-
Windows usually include glass type, sill height, and opening percentage
Understanding these differences helps you select the right family and avoid mistakes later.
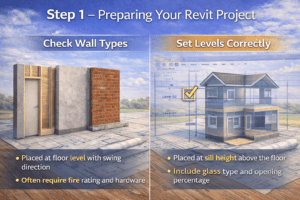
Step 1 – Preparing Your Revit Project
Before placing doors and windows, your project setup must be correct.
Check Wall Types
Doors and windows can only be placed in walls, so ensure:
-
Walls are created using proper wall types
-
Wall thickness matches design drawings
-
Wall heights are correct (base constraint and top constraint)
Incorrect wall setup is one of the most common reasons doors and windows don’t behave properly.
Set Levels Correctly
Levels define the vertical positioning of doors and windows:
-
Doors automatically align with the level they are placed on
-
Windows reference the level plus sill height
Always confirm that levels match architectural drawings before inserting families.
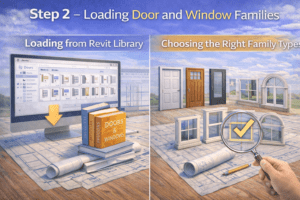
Step 2 – Loading Door and Window Families
Revit does not load all families by default. You must load what you need.
Loading from Revit Library
To load families:
-
Go to Insert → Load Family
-
Navigate to the Doors or Windows folder
-
Select the required family type
-
Click Open
Once loaded, the family becomes available in your project browser.
Choosing the Right Family Type
Not all families are equal. A good family should:
-
Be parametric (width and height adjustable)
-
Include correct swing or opening behavior
-
Contain shared parameters for scheduling
Avoid overly heavy families with unnecessary 3D details, as they slow down performance.
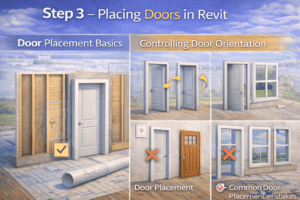
Step 3 – Placing Doors in Revit
Placing doors is simple, but accuracy matters.
Door Placement Basics
To place a door:
-
Go to Architecture → Door
-
Select a door type from the Properties panel
-
Hover over a wall until it highlights
-
Click to place the door
Revit automatically cuts the wall and inserts the door.
Controlling Door Orientation
Before placing:
-
Press Spacebar to flip the door swing
-
Use Flip Controls after placement to change handing
Correct door orientation is critical for plans, fire escape routes, and accessibility compliance.
Common Door Placement Mistakes
-
Placing doors on the wrong level
-
Incorrect swing direction
-
Using the wrong door type (interior vs exterior)
Always double-check doors in plan and 3D views.
Step 4 – Placing Windows in Revit
Windows follow a similar process but include extra height controls.
Window Placement Process
-
Go to Architecture → Window
-
Choose a window family type
-
Click on the wall where the window is required
The window is inserted at the default sill height.
Adjusting Sill Height
Sill height defines how high the window sits from the floor:
-
Change sill height in the Properties panel
-
Use consistent sill heights for a clean design
-
Match sill heights with architectural drawings
Aligning Windows Accurately
Use tools like:
-
Align (AL) to align window heads
-
Copy and Paste Aligned to Same Place
-
Temporary Dimensions for precise control
Consistency in window placement improves both appearance and documentation quality.

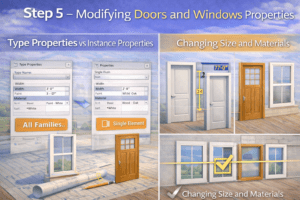
Step 5 – Modifying Door and Window Properties
Revit families can be customized easily.
Type Properties vs Instance Properties
Understanding this is essential:
-
Type Properties affect all instances of that family type
-
Instance Properties affect only the selected element
For example:
-
Changing door width in Type Properties updates all doors of that type
-
Changing sill height in Instance Properties affects only one window
Changing Size and Materials
Most families allow you to:
-
Modify width and height
-
Change frame and panel materials
-
Adjust glass material and transparency
Always test changes in 3D view to confirm results.
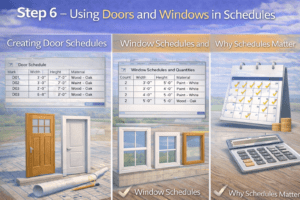
Step 6 – Using Doors and Windows in Schedules
One of Revit’s biggest advantages is automatic scheduling.
Creating Door Schedules
To create a door schedule:
-
Go to View → Schedules → Schedule/Quantities
-
Select Doors
-
Choose required parameters (width, height, type, level)
-
Click OK
Revit instantly generates a live schedule.
Window Schedules and Quantities
Window schedules can include:
-
Width and height
-
Sill height
-
Glass type
-
Quantity per level
Any change in the model updates the schedule automatically.
Why Schedules Matter
Schedules help with:
-
Quantity takeoffs
-
Cost estimation
-
Coordination with contractors
This is where Revit becomes far more powerful than traditional CAD.
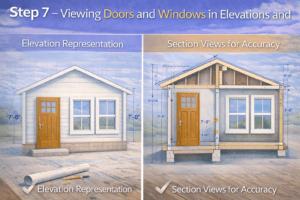
Step 7 – Viewing Doors and Windows in Elevations and Sections
Doors and windows are not just plan elements.
Elevation Representation
In elevations:
-
Doors show full height and frame
-
Windows show sill and head heights
-
Incorrect constraints become visible immediately
Always review elevations to catch modeling errors early.
Section Views for Accuracy
Sections help verify:
-
Wall thickness alignment
-
Door head heights
-
Window sill positioning
This is especially important in detailed construction drawings.
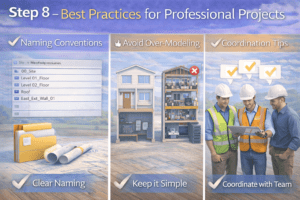
Step 8 – Best Practices for Professional Projects
Naming Conventions
Use clear naming like:
-
D-01 Single Flush Door
-
W-03 Sliding Window
Good naming improves coordination and avoids confusion.
Avoid Over-Modeling
Do not add unnecessary details such as:
-
Door handles in early design stages
-
Excessive frame profiles
-
High-poly glass details
Keep models lightweight and efficient.
Coordination Tips
-
Always coordinate doors with furniture layouts
-
Check window alignment with structural elements
-
Review clash detection if working with multiple disciplines
Final Thoughts
Doors and windows in Revit are far more than simple openings. They are intelligent components that play a major role in design accuracy, documentation quality, and project coordination.
By following this step-by-step approach, you can confidently place, modify, schedule, and manage doors and windows like a professional Revit user. Mastering these elements not only improves your models but also increases your value as a BIM professional.
With consistent practice and attention to detail, doors and windows will become one of the easiest—and most powerful—parts of your Revit workflow.