How to Use Modify Tools in Revit (Complete Practical Guide)
In Building Information Modeling, accuracy and flexibility are essential. While creating elements in a model is important, modifying them correctly is what truly defines professional work. In Autodesk Revit, Modify tools play a critical role in shaping, adjusting, and refining model elements throughout the project lifecycle.
This guide explains how to use Modify Tools in Revit step by step, with practical explanations and real-world usage. Whether you are a beginner or an experienced BIM professional, understanding these tools will significantly improve your workflow, speed, and modeling accuracy.
Understanding Modify Tools in Revit
Modify tools are not separate commands that you activate from a fixed panel. Instead, they appear contextually when you select any element in Revit. This makes them powerful but sometimes confusing for new users.
What Are Modify Tools?
Modify tools allow you to:
-
Move, rotate, and align elements
-
Adjust geometry without recreating objects
-
Maintain model accuracy during design changes
-
Edit elements while preserving parametric relationships
In short, Modify tools help you change without breaking your model.

Where to Find Modify Tools
Location of Modify Tools
When you select any element:
-
Revit automatically switches to the Modify tab
-
The tools shown depend on the selected element
-
Walls, doors, floors, and families each show different modify options
This contextual behavior ensures you only see relevant tools, reducing clutter and confusion.
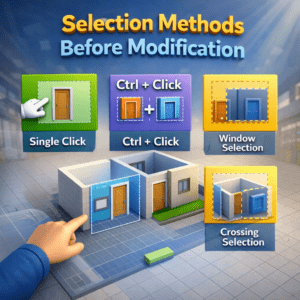
Selection Methods Before Modification
Before using any Modify tool, correct selection is crucial.
Basic Selection Techniques
-
Single Click – Selects one element
-
Ctrl + Click – Selects multiple individual elements
-
Window Selection (Left to Right) – Selects only fully enclosed elements
-
Crossing Selection (Right to Left) – Selects all touched elements
Proper selection prevents accidental changes and saves time.
Core Modify Tools in Revit
Now let’s explore the most commonly used Modify tools and how they are applied in real projects.
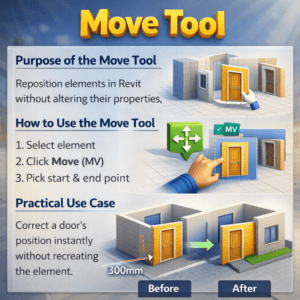
Move Tool
Purpose of the Move Tool
The Move tool allows you to reposition elements without altering their properties.
How to Use the Move Tool
-
Select the element
-
Click Move (MV)
-
Click a start point
-
Click an end point
Practical Use Case
For example, if a door is incorrectly placed 300mm away from its intended location, the Move tool helps correct this instantly without deleting and recreating the door.
Copy Tool
Why Copy Is Important
The Copy tool saves time when repeating elements like furniture, lighting fixtures, or columns.
How to Copy Elements
-
Select the element
-
Click Copy (CO)
-
Specify base point
-
Place copies as needed
Copy with Multiple Option
By enabling Multiple, you can place repeated copies continuously, which is ideal for layouts like parking lines or seating arrangements.

Rotate Tool
Function of Rotate Tool
Rotate allows you to change orientation while keeping the element’s location intact.
Steps to Rotate
-
Select the element
-
Click Rotate (RO)
-
Adjust rotation angle manually or type exact degrees
Real-World Example
Rotating furniture to align with angled walls is a common task where this tool proves extremely useful.

Mirror Tools
Types of Mirror Tools
-
Mirror – Pick Axis
-
Mirror – Draw Axis
When to Use Mirror
Mirror tools are best for symmetrical layouts such as:
-
Hotel rooms
-
Apartment units
-
Washroom layouts
Using Mirror ensures design consistency and reduces modeling effort.

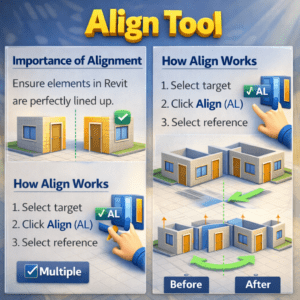
Align Tool
Importance of Alignment
Misaligned elements lead to poor documentation and coordination errors. The Align tool solves this efficiently.
How Align Works
-
Click Align (AL)
-
Select reference element
-
Select element to align
Best Practice
Always align doors, windows, and fixtures with reference grids or walls to maintain construction accuracy.
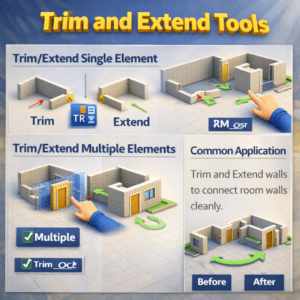
Trim and Extend Tools
Trim/Extend Single Element
Used when adjusting walls or lines individually.
Trim/Extend Multiple Elements
Ideal for cleaning up intersecting walls or sketch lines quickly.
Common Application
These tools are frequently used during floor sketch editing and wall layout corrections.
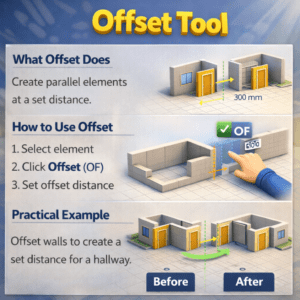
Offset Tool
What Offset Does
Offset creates a parallel copy of an element at a defined distance.
How to Use Offset
-
Select element
-
Click Offset (OF)
-
Enter offset value
-
Click direction
Practical Example
Offset is commonly used for:
-
Creating wall layers
-
Drawing boundary lines
-
Generating parallel reference geometry
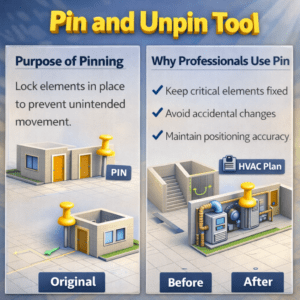
Pin and Unpin Tool
Purpose of Pinning
Pinning prevents accidental movement of critical elements like:
-
Grids
-
Levels
-
Structural columns
Why Professionals Use Pin
It protects model integrity, especially in large projects with multiple team members.
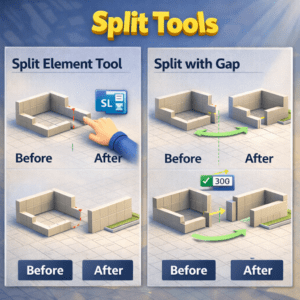
Split Tools
Split Element Tool
Used to divide walls, beams, or pipes into separate segments.
Split with Gap
Creates a physical gap, useful in demolition or phased projects.
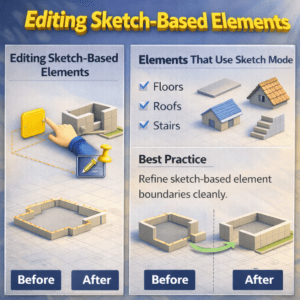
Editing Sketch-Based Elements
Certain elements require sketch editing instead of direct modification.
Elements That Use Sketch Mode
-
Floors
-
Roofs
-
Ceilings
-
Filled regions
Best Practice
Use Trim, Extend, and Align inside sketch mode for clean and accurate boundaries.
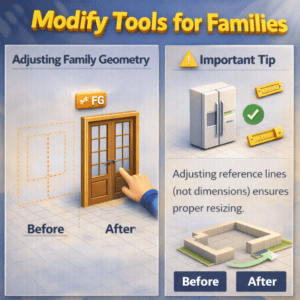
Modify Tools for Families
Adjusting Family Geometry
Families can be:
-
Resized
-
Rotated
-
Mirrored
-
Aligned
Important Tip
Always check constraints and parameters before modifying families to avoid unexpected behavior.
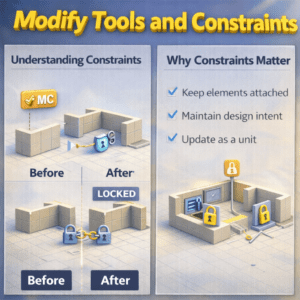
Modify Tools and Constraints
Understanding Constraints
Constraints lock relationships between elements.
Why Constraints Matter
They:
-
Preserve design intent
-
Prevent errors during changes
-
Maintain dimensional accuracy
Always review constraints before using Move or Rotate tools.
Common Mistakes to Avoid
Avoid These Errors
-
Moving pinned elements unintentionally
-
Ignoring constraints
-
Overusing mirror without checking orientation
-
Editing without proper selection
Awareness of these mistakes improves model stability.

Best Practices for Using Modify Tools
Professional Tips
-
Use keyboard shortcuts for speed
-
Work with temporary dimensions
-
Zoom in before modifying small elements
-
Pin critical elements early
These habits separate average users from skilled Revit professionals.
Why Mastering Modify Tools Is Essential
Modify tools are not optional; they are core to Revit modeling. Every design change, coordination update, or client revision relies on them.
By mastering these tools, you will:
-
Work faster
-
Reduce errors
-
Improve model quality
-
Increase professional confidence
Conclusion
Understanding how to use Modify Tools in Revit is a foundational skill for anyone working in BIM. These tools allow you to refine designs, respond to changes, and maintain accuracy without rebuilding your model from scratch.
With consistent practice and proper technique, Modify tools will become second nature, enabling you to work smarter—not harder—in Revit.