Revit Interface Explained: Ribbon, Properties Palette, and Project Browser
Learning Revit can feel overwhelming at first, especially when you open the software and see so many panels, tabs, and options on the screen. Unlike traditional CAD tools, Revit is not just about drawing lines—it is about building information. To work efficiently, the first thing every beginner and intermediate user must understand is the Revit interface.
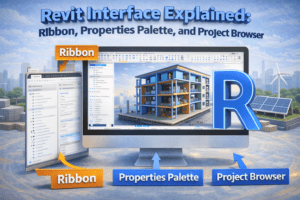
In this article, we will explain the Revit interface in detail, focusing on the three most important components: the Ribbon, the Properties Palette, and the Project Browser. Once you understand how these elements work together, your modeling speed, accuracy, and confidence in Revit will improve significantly.
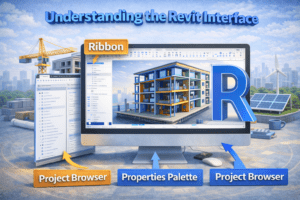
Understanding the Revit Interface
The Revit interface is designed to support Building Information Modeling (BIM). Every tool, panel, and option exists to help you create, manage, and coordinate building data. Unlike AutoCAD, where tools remain mostly static, Revit’s interface is highly contextual. What you see on the screen changes depending on what you are doing and what you have selected.
Key Components of the Revit Interface
Before diving deep, let’s identify the main interface elements:
-
Ribbon (top of the screen)
-
Properties Palette (usually on the left or right)
-
Project Browser (usually below the Properties Palette)
-
Drawing Area (center workspace)
-
Status Bar (bottom of the screen)
Among these, the Ribbon, Properties Palette, and Project Browser form the core workflow of Revit. You will use them constantly throughout any project.
The Ribbon in Revit
The Ribbon is the primary command center in Revit. It is located at the top of the interface and contains all the tools needed to create and modify elements.
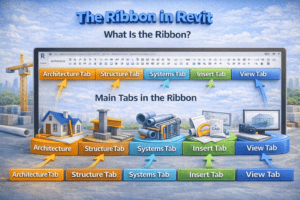
What Is the Ribbon?
The Ribbon is a tab-based menu system. Each tab represents a specific category of tasks, such as modeling, annotation, or collaboration. Instead of showing every tool at once, Revit organizes commands logically to reduce clutter and improve focus.
Main Tabs in the Ribbon
Architecture Tab
The Architecture tab is one of the most frequently used tabs, especially for architectural modeling. It contains tools for creating walls, doors, windows, floors, roofs, ceilings, stairs, and components.
Architects spend most of their time in this tab while developing the building layout and form.
Structure Tab
The Structure tab is used for structural modeling. It includes tools for columns, beams, foundations, braces, and reinforcement. Structural engineers rely on this tab to define the load-bearing elements of the building.
Systems Tab
The Systems tab is essential for MEP modeling. It contains tools for mechanical, electrical, and plumbing systems such as ducts, pipes, cable trays, and equipment.
Insert Tab
The Insert tab allows you to bring external data into your project. You can link CAD files, import images, link Revit models, and load families. This tab is commonly used when coordinating with other disciplines.
Annotate Tab
The Annotate tab is used for documentation. It includes tools for dimensions, text, tags, detail lines, symbols, and keynotes. This tab is crucial during the drawing and sheet preparation phase.
View Tab
The View tab controls how you see your model. It includes tools for creating views, sections, elevations, 3D views, and controlling visibility and graphics.
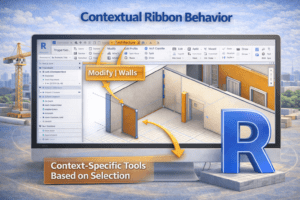
Contextual Ribbon Behavior
One of the most powerful features of the Ribbon is that it changes based on selection.
Selection-Based Tools
When you select a wall, door, or any element, a contextual tab appears. This tab provides tools specific to that element, such as editing profiles, adding reveals, or changing constraints.
This behavior helps users focus only on relevant tools, improving efficiency and reducing mistakes.
The Properties Palette
The Properties Palette is where you define and control the characteristics of elements and views. If the Ribbon is where you choose what to do, the Properties Palette is where you control how things behave.
What Is the Properties Palette?
The Properties Palette displays parameters for whatever is currently selected. If nothing is selected, it shows view properties. If an element is selected, it shows that element’s properties.
This makes the Properties Palette one of the most important panels in Revit.

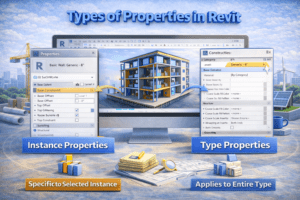
Types of Properties in Revit
Instance Properties
Instance properties affect only the selected element. For example, changing the base offset of one wall will not affect other walls of the same type.
Instance properties are useful for fine-tuning individual elements.
Type Properties
Type properties affect all elements of the same type. For example, changing wall thickness in type properties will update every wall using that type.
Understanding the difference between instance and type properties is critical to avoiding unintended changes.
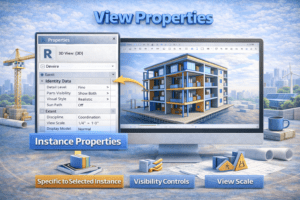
View Properties
When no element is selected, the Properties Palette shows view-related settings. These include:
-
View scale
-
Detail level
-
Visual style
-
View range
-
Discipline
These settings control how the model appears in that specific view.
Why the Properties Palette Matters
Most beginners try to control everything from the Ribbon, but experienced users rely heavily on the Properties Palette. It allows precise control, consistency, and data accuracy, which are essential in BIM workflows.
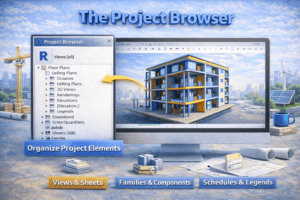
The Project Browser
The Project Browser is your navigation tool inside Revit. It organizes all views, sheets, schedules, and families in a structured hierarchy.
What Is the Project Browser?
The Project Browser is a tree-style panel that shows everything inside your Revit project. It allows you to quickly switch between views and manage project data.
Without the Project Browser, navigating a large Revit model would be extremely difficult.
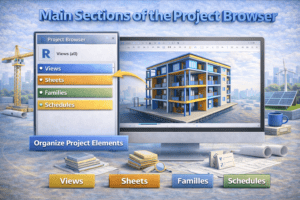
Main Sections of the Project Browser
Views
The Views section contains all plan views, elevations, sections, 3D views, legends, and drafting views. These are grouped by type and level.
You can double-click any view to open it instantly.
Sheets
The Sheets section shows all drawing sheets in the project. Each sheet can contain multiple views placed for printing or submission.
This section becomes very important during the documentation phase.
Schedules and Quantities
Schedules display data extracted from the model, such as door schedules, room schedules, and material takeoffs. They are live and update automatically when the model changes.
Families
The Families section lists all loaded families in the project, organized by category. You can expand each family to see its types.
Customizing the Project Browser
Revit allows you to customize how the Project Browser is organized. You can group views by level, discipline, or custom parameters.
Proper Project Browser organization is essential for large projects and team collaboration.
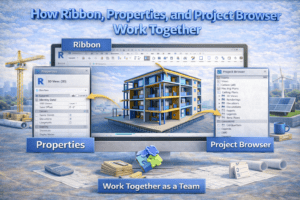
How Ribbon, Properties, and Project Browser Work Together
Understanding each component individually is important, but real efficiency comes from knowing how they work together.
Typical Workflow Example
-
You select a tool from the Ribbon (for example, Wall).
-
You adjust settings in the Properties Palette (wall type, height, constraints).
-
You choose the correct view from the Project Browser.
-
You place and modify elements in the drawing area.
This cycle repeats constantly during modeling and documentation.
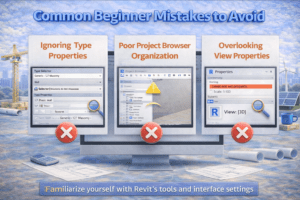
Common Beginner Mistakes to Avoid
Ignoring Type Properties
Many beginners change instance properties when they should be editing type properties. This leads to inconsistent models and extra work.
Poor Project Browser Organization
Leaving default view names and not organizing views can slow down your workflow as the project grows.
Overlooking View Properties
Incorrect view settings can cause elements to appear missing or incorrect, leading to confusion and errors.
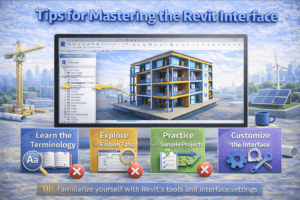
Tips for Mastering the Revit Interface
-
Spend time learning where tools are located in the Ribbon.
-
Frequently check the Properties Palette before making changes.
-
Rename and organize views early using the Project Browser.
-
Customize your workspace to match your workflow.
-
Practice selecting elements and observing how properties change.
Conclusion
The Revit interface may seem complex at first, but it is logically designed to support BIM workflows. The Ribbon provides the tools, the Properties Palette controls behavior and data, and the Project Browser organizes the project. Together, they form the backbone of efficient Revit usage.
Once you understand how these three components interact, Revit becomes far more intuitive. Instead of searching for tools or struggling with settings, you can focus on what truly matters—creating accurate, coordinated, and intelligent building models.
Mastering the Revit interface is not just about learning software; it is about thinking in BIM.