Revit View Templates Explained
Revit View Templates Explained helps users understand how to maintain consistent graphics and visibility settings across multiple views in Autodesk Revit. In large projects with hundreds of views, managing visibility settings, detail levels, view scales, filters, and graphic overrides individually can quickly become difficult. Without using view templates, manually adjusting these settings for every view can consume significant time and increase the risk of inconsistencies in project documentation.
This is where Revit View Templates become extremely valuable.
View Templates allow users to control and standardize the visual settings of views. Instead of adjusting settings individually for each view, you can create a template and apply it across multiple views. This ensures consistency, saves time, and improves project quality.
In this guide, we will explore what Revit View Templates are, why they are important, how they work, and how you can use them effectively in your workflow.
What Are Revit View Templates?
A View Template in Revit is a collection of view settings that can be applied to multiple views to maintain consistency. These settings may include visibility controls, graphic overrides, filters, view scale, detail level, and many other parameters.
Instead of configuring each view manually, a template allows you to define the settings once and reuse them wherever needed.
For example, if you create a Floor Plan template for architectural drawings, you can control:
-
Visibility of categories
-
View scale
-
Detail level
-
Graphics overrides
-
View filters
-
Annotation visibility
-
Discipline settings
Once the template is created, you can apply it to multiple floor plan views and all those views will follow the same configuration.
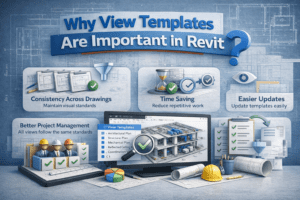
Why View Templates Are Important in Revit
Managing views without templates can quickly become chaotic, especially in large BIM projects involving multiple disciplines.
View Templates provide several key benefits.
Consistency Across Drawings
Using templates ensures that all views maintain the same visual standards. This is extremely important when producing construction documents.
Without templates, one view might show hidden lines while another might show shaded graphics, creating inconsistencies in the drawing set.
Time Saving
Instead of repeatedly adjusting settings for each view, templates allow you to configure the settings once and reuse them. This dramatically reduces repetitive work.
Better Project Management
In large teams, multiple users may create views. Templates ensure everyone follows the same standards.
Easier Updates
If project standards change, you only need to modify the template. All views using that template will update automatically.
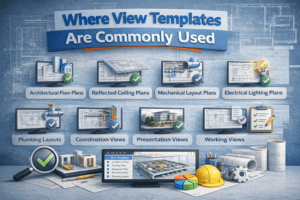
Where View Templates Are Commonly Used
View Templates are used across almost every discipline in BIM projects.
Typical examples include:
-
Architectural Floor Plans
-
Reflected Ceiling Plans
-
Mechanical Layout Plans
-
Electrical Lighting Plans
-
Plumbing Layouts
-
Coordination Views
-
Presentation Views
-
Working Views
Each of these view types may require different settings, which can be controlled using templates.
How View Templates Work in Revit
Revit stores view templates within the project file. A template contains multiple view properties that control how the view appears.
When a template is applied to a view, the settings inside the template override the view’s individual settings.
For example, if the template controls:
-
Visibility Graphics
-
Detail Level
-
View Scale
Then these parameters cannot be modified directly in the view unless the template allows it.

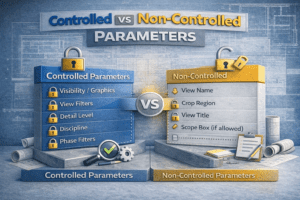
Controlled vs Non-Controlled Parameters
One important feature of View Templates is the ability to decide which parameters are controlled by the template.
Some parameters may remain editable in the view, while others remain locked by the template.
For example:
Controlled Parameters
-
Visibility / Graphics
-
View Filters
-
Detail Level
-
Discipline
-
Phase Filters
Non-Controlled Parameters
-
View Name
-
Crop Region
-
View Title
-
Scope Box (if allowed)
This flexibility allows teams to standardize important settings while keeping some view-specific properties editable.
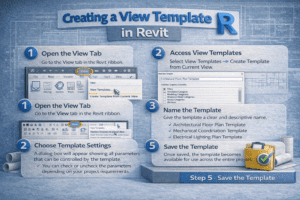
Creating a View Template in Revit
Creating a view template is a straightforward process.
Step 1 – Open the View Tab
Go to the View tab in the Revit ribbon.
Step 2 – Access View Templates
Select View Templates → Create Template from Current View.
This allows you to use an existing view as the base for your template.
Step 3 – Name the Template
Give the template a clear and descriptive name.
Examples:
-
Architectural Floor Plan Template
-
Mechanical Coordination Template
-
Electrical Lighting Plan Template
Clear naming helps teams quickly identify the correct template.
Step 4 – Choose Template Settings
A dialog box will appear showing all parameters that can be controlled by the template.
You can check or uncheck the parameters depending on your project requirements.
Step 5 – Save the Template
Once saved, the template becomes available for use across the entire project.
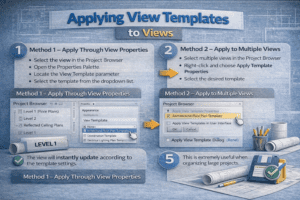
Applying View Templates to Views
After creating a template, you can apply it to any view.
Method 1 – Apply Through View Properties
-
Select the view in the Project Browser
-
Open the Properties Palette
-
Locate the View Template parameter
-
Select the template from the dropdown list
The view will instantly update according to the template settings.
Method 2 – Apply to Multiple Views
Revit allows applying templates to multiple views at once.
Steps:
-
Select multiple views in the Project Browser
-
Right-click and choose Apply Template Properties
-
Select the desired template
This is extremely useful when organizing large projects.
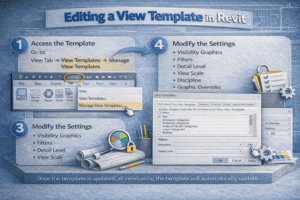
Editing a View Template
Templates can be modified at any time.
Access the Template
Go to:
View Tab → View Templates → Manage View Templates
A dialog box will display all templates available in the project.
Modify the Settings
You can edit:
-
Visibility Graphics
-
Filters
-
Detail Level
-
View Scale
-
Discipline
-
Graphic Overrides
Once the template is updated, all views using the template will automatically update.
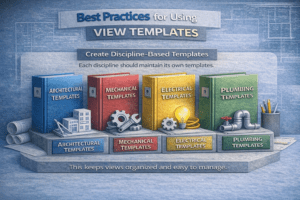
Best Practices for Using View Templates
To get the most benefit from View Templates, it is important to follow good project practices.
Create Discipline-Based Templates
Each discipline should maintain its own templates.
Examples:
-
Architectural Templates
-
Mechanical Templates
-
Electrical Templates
-
Plumbing Templates
This keeps views organized and easy to manage.
Use Clear Naming Conventions
A well-structured naming system helps teams quickly find the correct template.
Example naming structure:
-
A – Floor Plan Working
-
A – Floor Plan Presentation
-
M – Mechanical Coordination
-
E – Lighting Layout
Using prefixes such as A, M, E, P helps identify the discipline.
Avoid Over-Controlling Parameters
Not every parameter needs to be controlled by the template.
Over-controlling can restrict flexibility and make editing difficult.
Allow views to control certain properties such as:
-
Crop Regions
-
Annotation visibility
-
Scope boxes
Standardize Templates in Company Projects
Most BIM teams create standard template libraries that are reused across projects.
This ensures:
-
Consistent drawing standards
-
Faster project setup
-
Reduced errors
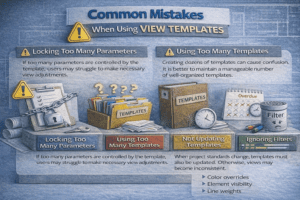
Common Mistakes When Using View Templates
Even experienced Revit users sometimes misuse View Templates.
Locking Too Many Parameters
If too many parameters are controlled by the template, users may struggle to make necessary view adjustments.
Using Too Many Templates
Creating dozens of templates can cause confusion. It is better to maintain a manageable number of well-organized templates.
Not Updating Templates
When project standards change, templates must also be updated. Otherwise, views may become inconsistent.
Ignoring Filters
Filters play a powerful role in view templates but are often underutilized.
They can control:
-
Color overrides
-
Element visibility
-
Line weights
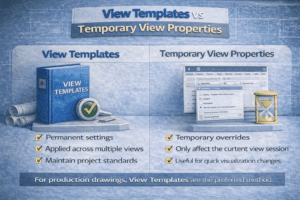
View Templates vs Temporary View Properties
Revit also offers Temporary View Properties, which may confuse some users.
View Templates
-
Permanent settings
-
Applied across multiple views
-
Maintain project standards
Temporary View Properties
-
Temporary overrides
-
Only affect the current view session
-
Useful for quick visualization changes
For production drawings, View Templates are the preferred method.
View Templates in BIM Workflows
In BIM workflows, View Templates are essential for maintaining structured and standardized project documentation.
They help teams:
-
Control model visibility
-
Maintain drawing consistency
-
Improve coordination between disciplines
-
Reduce errors in documentation
For large projects with hundreds of views, templates become a core management tool rather than just a convenience.

Final Thoughts
Revit View Templates are one of the most powerful features for managing views efficiently in BIM projects. They allow teams to standardize graphics, improve consistency, and significantly reduce repetitive work.
By creating well-organized templates and applying them properly, teams can maintain high-quality documentation across large and complex projects.
Whether you are working on architectural drawings, MEP layouts, or coordination views, mastering View Templates will make your Revit workflow faster, cleaner, and more professional.
For anyone serious about working with BIM, learning how to use View Templates effectively is an essential skill.