Stairs and Railings in Revit: Stair by Component vs Sketch, Railing Customization, and Design Tips
Stairs and railings are more than just vertical circulation elements in a building. They directly affect safety, usability, aesthetics, and coordination between architectural, structural, and MEP disciplines. In Building Information Modeling (BIM), especially in Revit, modeling stairs and railings correctly can save a significant amount of time during documentation and reduce errors during construction.
This blog provides a complete guide to stairs and railings, focusing on Stair by Component vs Stair by Sketch, railing customization and attachment, and practical stair design tips that align with real-world construction standards.
Understanding Stairs and Railings in BIM
In Revit, stairs and railings are intelligent, parametric elements. Unlike basic modeled geometry, they respond to level changes, code requirements, and design modifications automatically.
Proper modeling of stairs and railings helps:
-
Maintain correct riser and tread calculations
-
Ensure code compliance
-
Improve coordination with floors, landings, and railings
-
Produce accurate schedules and drawings
Before choosing a modeling method, it’s important to understand how Revit handles stairs internally.
Stair by Component vs Stair by Sketch
Revit offers two main methods for creating stairs. Each method has its own strengths and limitations, depending on the project requirements.
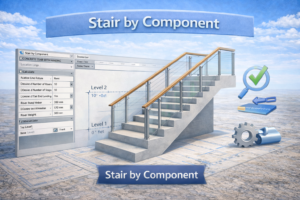
Stair by Component (Recommended Method)
What Is Stair by Component?
Stair by Component is the modern and preferred method introduced to simplify stair creation. Instead of drawing everything manually, Revit generates the stair automatically based on rules such as riser height, tread depth, and level constraints.
Key Features of Stair by Component
-
Automatic calculation of risers and treads
-
Built-in landings
-
Code-compliant by default
-
Easy modification after creation
-
Supports straight, L-shaped, U-shaped, and spiral stairs
Advantages of Stair by Component
Stair by Component is ideal for most architectural and commercial projects because it:
-
Reduces modeling time
-
Minimizes calculation errors
-
Updates automatically when levels change
-
Integrates seamlessly with railings
Limitations
While powerful, this method may feel restrictive for highly decorative or irregular stair designs. Very complex geometries may require additional customization or alternative modeling approaches.
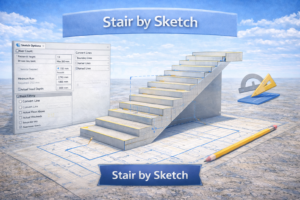
Stair by Sketch (Manual Control Method)
What Is Stair by Sketch?
Stair by Sketch allows the user to manually draw risers, boundaries, and paths. This method offers more control over geometry but requires careful attention to detail.
When to Use Stair by Sketch
Stair by Sketch is useful when:
-
The stair shape is unconventional
-
You need full control over riser placement
-
The design does not follow standard rules
Advantages
-
Greater flexibility in shape
-
Suitable for unique architectural designs
-
Allows custom riser patterns
Disadvantages
-
Time-consuming
-
Higher risk of errors
-
Manual calculations required
-
Less forgiving when levels change
For most professional projects, Stair by Component is preferred, while Stair by Sketch is reserved for special cases.
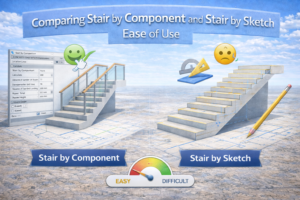
Comparing Stair by Component and Stair by Sketch
Ease of Use
Stair by Component is significantly easier for beginners and professionals alike. Stair by Sketch requires deeper technical understanding.
Accuracy
Component-based stairs are more reliable because Revit handles the math. Sketch-based stairs depend on user precision.
Modification
Component stairs are easier to modify later. Sketch stairs often require redrawing.
Recommendation
Use Stair by Component for 90% of projects. Choose Stair by Sketch only when design constraints demand it.
Railing Customization in Revit
Railings are closely linked with stairs, ramps, floors, and balconies. Proper railing customization enhances both safety and visual quality.
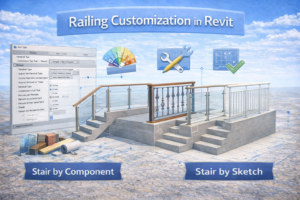
Understanding Railing Structure
A railing system consists of:
-
Top rail
-
Handrail (optional)
-
Balusters
-
Posts
-
Rail supports
Each element can be controlled individually through the railing type properties.
Customizing Railings Step by Step
Modifying Railing Type
Instead of editing a railing directly, always duplicate the railing type. This ensures project consistency and avoids unintended changes.
Adjusting Height and Offset
Railing height should follow local codes. In Revit, height can be adjusted relative to:
-
Stair treads
-
Landings
-
Host floors
Offsets help align railings visually with finishes and edges.
Editing Balusters
Baluster spacing, shape, and material greatly affect the appearance. You can:
-
Change spacing rules
-
Use different baluster families
-
Control start, middle, and end posts
Materials and Finishes
Assign realistic materials to railings for accurate rendering and presentation. Metal, glass, and wood finishes should match the design intent.
Railing Attachment and Hosting
Automatic Railing Attachment
When a stair is created using Stair by Component, railings can be attached automatically. This ensures:
-
Correct alignment
-
Automatic updates with stair changes
Attaching Railings to Floors and Ramps
Railings can also be hosted on:
-
Floors
-
Ramps
-
Sloped slabs
This is useful for balconies, terraces, and podium levels.
Common Attachment Issues
-
Railings not following slope
-
Incorrect offsets at landings
-
Gaps between stair and railing
These issues are usually resolved by checking host selection and offset parameters.
Stair Types and Their Design Applications
Different projects require different stair types. Understanding where each type works best is essential for efficient design.
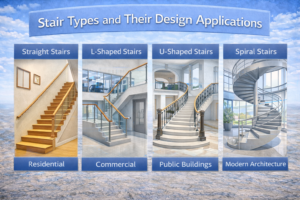
Straight Stairs
Use Case
-
Residential buildings
-
Small commercial spaces
Pros
-
Simple design
-
Easy construction
-
Minimal space requirement
Cons
-
Requires more linear space
L-Shaped Stairs
Use Case
-
Homes
-
Office buildings
Benefits
-
Safer than straight stairs
-
Fits better in corners
-
Includes resting landing
U-Shaped Stairs
Use Case
-
Multi-story buildings
-
Public facilities
Advantages
-
Compact footprint
-
Comfortable movement
-
Good visual balance
Spiral Stairs
Use Case
-
Limited space
-
Architectural features
Limitations
-
Not ideal for heavy traffic
-
Difficult for furniture movement
Spiral stairs should be used carefully and often require special approval.
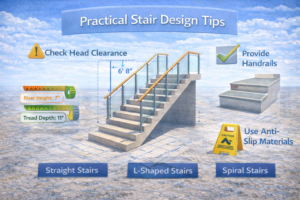
Practical Stair Design Tips
Follow Local Building Codes
Always verify:
-
Minimum tread depth
-
Maximum riser height
-
Handrail requirements
Ignoring codes can lead to redesign and approval issues.
Maintain Consistency
Uniform riser heights and tread depths are critical for safety and comfort.
Plan Headroom Carefully
Ensure sufficient head clearance, especially under landings and structural beams.
Coordinate Early with Structure
Stair openings, landings, and supports should be coordinated with structural teams early in the design phase.
Think About User Experience
Stairs are used daily. Comfortable dimensions, good lighting, and secure railings improve usability.
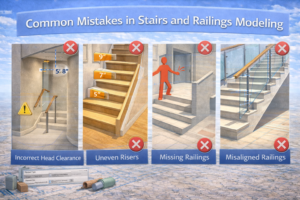
Common Mistakes in Stairs and Railings Modeling
Overusing Stair by Sketch
Using sketch-based stairs unnecessarily increases errors and workload.
Ignoring Railing Offsets
Incorrect offsets can cause railings to clash with finishes or walls.
Not Testing Design Changes
Always check stair behavior after level or floor height changes.
Poor Naming of Types
Unclear naming leads to confusion in large projects. Use clear, standardized names.
Best Practices for Professional Projects
-
Always duplicate stair and railing types before editing
-
Use reference levels correctly
-
Keep stair and railing families organized
-
Test stairs in sections, plans, and 3D views
-
Review stair schedules for accuracy

Conclusion
Stairs and railings play a critical role in both building functionality and design quality. Choosing the right modeling method, understanding railing customization, and applying proper design principles can significantly improve project outcomes.
For most projects, Stair by Component offers speed, accuracy, and flexibility, while Stair by Sketch remains useful for unique architectural requirements. Proper railing attachment and customization ensure safety and visual consistency, while thoughtful stair design enhances user comfort and code compliance.
Mastering stairs and railings in Revit is not just about tools—it’s about combining technical knowledge with practical design understanding.