Understanding Types of Floors in Revit
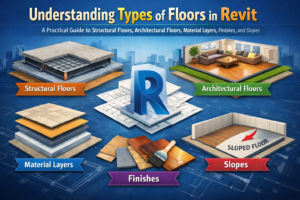
A Practical Guide to Structural Floors, Architectural Floors, Material Layers, Finishes, and Slopes
If you’ve spent any time working in Revit, you already know that floors are much more than flat surfaces. They are systems—sometimes simple, sometimes complex—that influence everything from load distribution and fire ratings to finishes, drainage, and even how spaces feel. Yet for many new (and not-so-new) users, navigating Revit’s floor tools can feel like stepping into a maze. Which floor type should I use? How do layers actually work? What’s the correct way to add a finish? And how do I create slopes without accidentally tilting the entire building?
This post breaks down the essentials: structural vs. architectural floors, compound structures and material layers, and the proper workflow for finishes and slope creation. Whether you’re modeling your first building or refining your BIM workflow, the goal here is clarity—so you can model smarter, faster, and with greater intention.

Let’s start where every Revit user eventually has questions:
What exactly is the difference between structural and architectural floors?
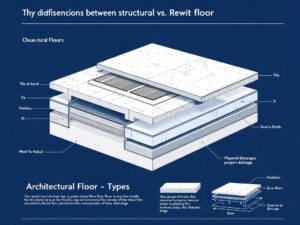
Structural Floors vs. Architectural Floors in Revit: Why the Difference Matters
On the surface, both floor types look similar. They’re both created from the same floor tool, and visually, they appear identical in 3D. But their purpose—and behavior in documentation—couldn’t be more different.
Structural Floors: The Backbone of the Building
A structural floor is exactly what it sounds like: a load-bearing horizontal system designed to support loads and transfer forces down to the building’s structural frame.
Here’s what distinguishes structural floors in Revit:
- They participate in the analytical model.
This means engineers can use them for structural analysis—load paths, connections, and support conditions. - They include structural parameters.
For instance, they can define structural function, structural usage, and support conditions. - They interact with beams, walls, and columns differently.
Structural floors can become hosts for structural components, and they engage cleanly with the structural framing system. - They often define the base of the slab assembly.
Think cast-in-place concrete, composite metal deck slabs, precast planks, or post-tensioned slabs.
In real projects, the structural engineer usually controls these elements. The architectural model may reference them, but the structural model is often the source of truth.
Architectural Floors: The Finish and Spatial Layer
Architectural floors, on the other hand, focus on interior layout, finishes, circulation, and space definition. They might not carry structural loads, but they play a major role in how a building functions and feels.
Key characteristics include:
- They are used to represent finishes or non-structural layers.
Floor tiles, wood planks, carpets, raised floors, or acoustic underlayment all fall under this category. - They do not participate in structural analysis.
Which keeps things cleaner on the engineering side. - They help define room boundaries.
Rooms use floors as part of their enclosing geometry. - They offer design flexibility.
Architects can easily change materials, thicknesses, and compositions without interfering with structural work.
In many projects, the architectural floor sits directly above a structural slab. This layering allows architects to maintain control over finishes while keeping the structural slab unchanged and coordinated with the engineer.
Compound Structures and Material Layers in Revit Floors
Revit becomes incredibly powerful the moment you understand how compound floor structures work. Instead of modeling every layer separately, you can build a single assembly that contains everything—from structural concrete to vapor barriers to carpet tiles.
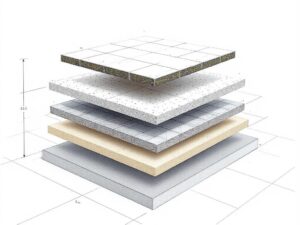
What Is a Compound Structure?
A compound structure is a layered assembly that defines:
- Thickness of each layer
- Materials
- Functions (finish, substrate, structure, membrane)
- Behavior in section views
- How the layers join with other building elements
By using compound structures, you ensure your drawings stay coordinated—plans, sections, schedules, and details all update automatically when you change a floor type.
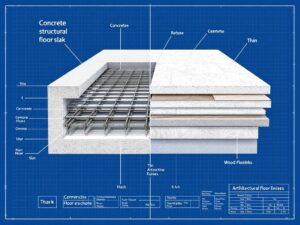
Understanding Material Layers
When you edit a floor type in Revit and click Edit Structure, you’ll see a list of layers. Each one has a function and material.
Typical floor example:
| Function | Material | Thickness |
| Finish 2 | Ceramic Tile | 10 mm |
| Finish 1 | Mortar Bed | 20 mm |
| Substrate | Screed | 40 mm |
| Structure | Reinforced Concrete | 150 mm |
This layered system represents a real-world floor assembly and drives multiple aspects of your model:
- Graphics in sections and plan
- Material quantities and takeoffs
- Thermal and structural properties
- Fire ratings
- Cut patterns and surface patterns
In real BIM workflows, this is where accuracy begins. A proper floor assembly prevents countless coordination issues down the line.
The Role of Material Function
Functions determine join behavior and which layers cut through others.
Revit floor functions include:
- Structure (1)
- Substrate
- Thermal/Air Layer
- Membrane Layer
- Finish 1
- Finish 2
The rule of thumb:
The structural layer always takes priority when floors meet walls or other structural elements.
Correct function usage is essential for neat joins and clean construction documents.

Floor Finishes: Modeling Strategies That Keep Your BIM Clean
Floor finishes may seem straightforward, but in Revit they can get messy fast if modeled incorrectly. There are two common methods:
Method 1: Add Finish Layers to the Floor Assembly
This works best when:
- The finish is consistent across the entire level
- There are no complicated transitions
- You want clean sections with proper layers
This method is efficient and the fastest to manage. But it breaks down when finishes vary from room to room.
Method 2: Use Separate Finish Floors
This method is used in most professional architectural projects.
You create a thin “finish floor” —usually 10–20 mm thick—and place it on top of the structural slab.
Advantages:
- Flexibility to change finishes per room
- Clean scheduling (you can schedule finish floors separately)
- Better coordination with structural models
- Ability to turn finishes on/off in views
- Detailed control over materials
A typical workflow:
- Structural engineer models the main slab.
- Architect references the structural model.
- Architect creates thin finish floors in their model.
- Finish floors are assigned to zones, rooms, or spaces.
This keeps the model clean and avoids the common issue of accidentally editing the structural floor just to update tile thickness.
Creating Slopes: Three Methods That Every Revit User Should Know
Sloping floors becomes important in a variety of situations: bathrooms, balconies, parking garages, ramps, courtyards, and roof drainage systems. Revit offers multiple ways to create slopes—each suited to different conditions.
Method 1: Slope Arrow
The slope arrow is the most controlled and predictable method. You define a start height and end height, and Revit creates a linear slope.
Best for:
- Bathrooms
- Balconies
- Small terraces
- Accessible ramps (with strict slope requirements)
Advantages:
- Precise control over elevation and grade
- Easy to adjust
- Great for documentation
Drawback:
It only creates straight slopes.
Method 2: Modify Sub-Elements
This method allows you to move individual points or edges on the top surface of the floor.
Perfect for:
- Parking garages
- Outdoor slabs with multiple drain points
- Complex surfaces
- Courtyards and plazas
Advantages:
- Total control over each corner or point
- Ability to create compound slopes
- Works well for site and drainage design
Drawback:
It can create messy geometry if overused or done without consistent logic.
Method 3: Add Points and Edit Elevations
This is a more advanced version of modifying sub-elements. You can place additional points anywhere on the floor’s surface and set their elevations.
Good for:
- Custom drainage patterns
- Interior waterproofing slopes
- Areas with multiple floor drains
Drawback:
Too many points can slow the model and complicate schedules.
Best Practices to Keep Your Revit Floors Clean and Manageable
Here are some practical tips learned from real-world BIM workflows:
- Don’t mix structural and finish functions in the same floor unless necessary.
Combining both can cause clashes with the structural model and confuse contractors reading the drawings.
- Use consistent floor types across levels.
If every floor type in your project is unique, managing schedules becomes a nightmare.
- Lock your structural levels before modeling finishes.
This prevents vertical misalignments that ripple into sections and details.
- Use view filters to control visibility of finish floors.
This helps keep plans clean and avoids double linework.
- Avoid over-modeling.
Model what matters. Don’t create a separate floor for every slight material change if a graphic override or region will do.
Conclusion: Mastering Floors Means Mastering Revit
Floors in Revit are more than building components. They’re an essential part of a coordinated, intelligent BIM model. Understanding the relationship between structural and architectural floors, using compound structures effectively, modeling finishes correctly, and creating slopes the right way makes your model more accurate, cleaner, and more professional.
The more intentional you are in setting up floors early in the project, the fewer coordination headaches you’ll deal with later. Floors touch almost every discipline—architecture, structure, MEP, interiors, and site work—so getting them right is a huge step toward a well-organized model.